Planning a photography trip
Planning a Photography Trip
Text and photos by Heather Cline
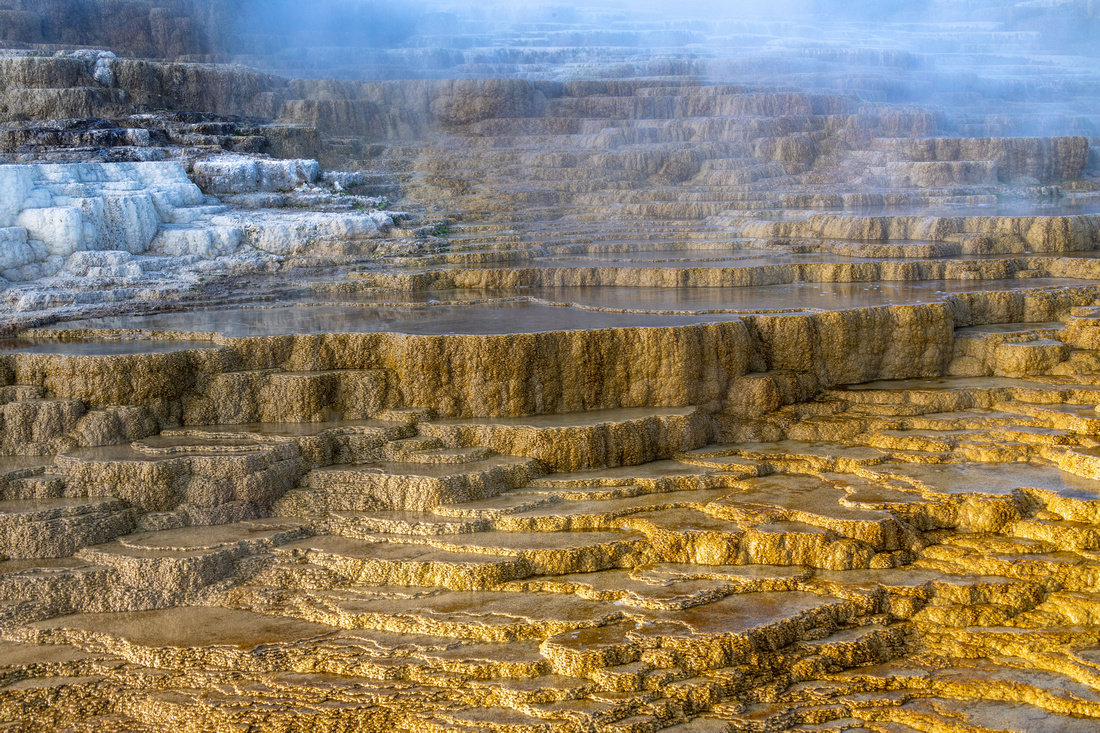 
Mammoth Hot Springs at sunrise, Yellowstone National Park |
I can't speak for all nature photographers, but there are few things that bring me more joy than a good photo trip. The two parts to a photo trip that are really exciting are: 1) going to a new location or revisiting an old one in pursuit of getting the perfect shot, 2) Planning it all out.
Yes, you read that correctly. Planning it is half the fun! Okay, maybe I'm a little crazy but planning a photo trip can be pretty easy - and even fun - if you know how to approach it.
This article provides 8 easy tips for planning a great photo trip.
1. Choose Your Location(s)
Obviously, you can't plan a photo trip if you don't know where your are going to go, but this is one of the easiest and most fun parts of the planning process. You probably already have something in mind, or at least a general idea, like tropical, mountain, desert, etc. If you have a high-level idea but aren't sure how to narrow it down, here are some ideas that can help:
- Think local: There are often locations that are photo worthy within driving distance of our homes. Some of these locations are destinations others travel from around the country or even world to see. For example, I live near Sacramento, California. Within 3 hours of my home are: Lake Tahoe, Yosemite, Lassen, San Francisco, to name a few, and these are destinations that people dream of visiting.
- Refer to your wish list: I don't know a single photographer who doesn't have a list of locations they would love to visit and photograph. It's always worth keeping a list tat you can refer to and choose from when you are ready to plan your next adventure. Time and cost will help narrow the focus down to the most viable options relatively quickly.
- Ask other photographers: Photographers usually enjoy talking about the places they visited and the shots they captured. Many of the trips I have planned were inspired by other photographer's descriptions and stories of their own trips.
- Tack it on: if you will be traveling for other reasons, such as work or to visit family, you might be able to get some photography in while you are there. If you will be driving to the location, you might be able to tailor your driving route to visit a bucket list location.
- Google: If you do a Google search for "photography workshops California" for example, you will get a list of popular locations for nature photography around the state. It doesn't mean you have to sign up for any of these workshops, but they can give you some great ideas on where to go - and who knows - maybe you will end up finding a great workshop to attend!
Fun Fact: While chatting with a photographer I met at Crater Lake NP, he mentioned a place called White Pocket. That one conversation inspired a 2 week trip that included that amazing location.
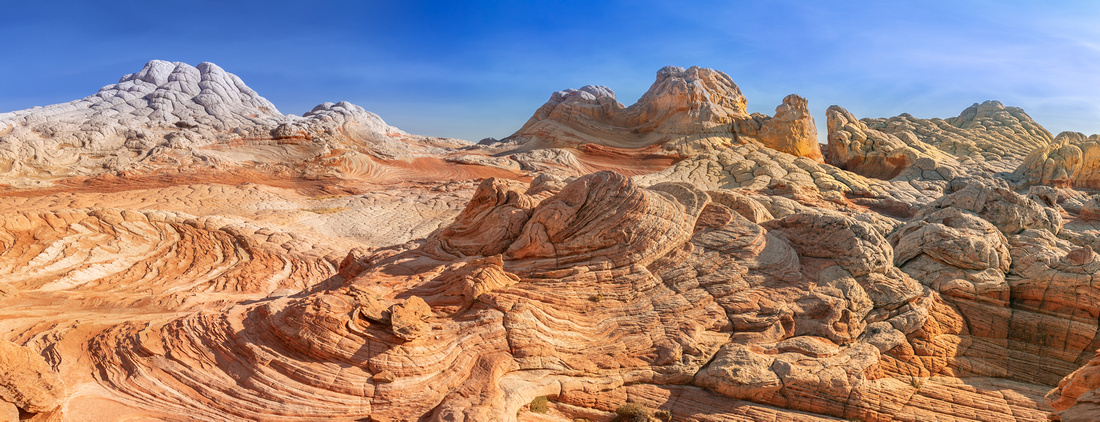 White Pocket Panorama, Vermillion Cliffs National Monument
 |
2. Do Your Research
Once you have decided on a location, it's time to get familiar. Why is this important? Because, your chances of getting successful images increases when you know where to be and when to be there. If you are more of a spontaneous traveler, this part of the journey might not be for you, but I can attest, research pays off. Here are some tools for researching a location:
- Google Images: This is a great way to see the variety of possible subjects a given location. I use this to help me create a shot list and to determine how long I want to stay at the location. I'm amazed how often one image leads to an idea, another search, another idea, another search, etc. Before I know it, I'll have a list of subjects that I can prioritize.
- Maps: Once you have some subjects outlined, seeing where they fall on the map can help you determine your travel time. Maps can also lead to other image ideas. For example, while planning a trip that took me through New Mexico, I found the Bisti Badlands which I had never heard of. If I hadn't been examining the map, I never would have stumbled on this location.
- Photo Pills: This is an app that provides all kinds of valuable information about sunrise, sunset, moonrise, moonset, moon phase, the milky way, and beyond. It is the single most heavily used tool I use when planning a trip because it helps me determine if the light, moon, or stars will be right at a specific location for the exact date(s) I will be there. There's nothing worse than getting to an iconic location only to find the sun won't be hitting it the way you imagined because it's the wrong time of year. Photo Pill can help you determine what is possible before you leave the house.
- Weather: You can't control the weather but you can prepare for it. I like to shot in changing weather because it adds more drama to the image, but mother nature can throw you cloudless blue skies or pouring rain for the entire trip. If I think weather could take a turn for the worse, I'll look into indoor backup plans like aquariums, sheltered areas I can still shot from, or just a good book so I can wait it out. When I am preparing my shot list, I'll also note which subjects and locations require direct or overcast light. This helps me pivot if the weather affects the lighting conditions.
- Willy Weather Tides: There are multiple apps and sites that provide this information, but I like Willy Weather for it's simple but visual representation of the tides at ant given day, time, and location. The tides can make or break a shot, and your ability to access or leave a location. For example, Hole In The Wall Beach in California can only be reached at low tide so you have to time your shot to occur while the tide is out.
- Dark Sky: darksky.org can help you find, or confirm if the location you are visiting is a dark sky location and it also uses a nice map visual to make it easy to see how many dark sky locations are near where you are traveling. If you enjoy taking night photos, this is a valuable tool.
- Workshops: In addition to helping you dial in a good photo location, workshops are also a great way to quickly see what time of year are most popular for workshops. Workshops websites typically include an itinerary which can give you some valuable information on where to go, when to be there, and how long to stay. They may offer trips to a location at different times of the year. They are going to schedule these for when the chances for getting good shots is optimal, so it's good to note that if you aren't locked into specific dates yet.
- Talk to people who have been there: Like determining a location, other photographers are great sources for learning about a location and are usually happy to share information.
- Know the restrictions: Some locations can only be accessed at certain times, via specific transportation, or by permit. Its a serious bummer to figure this out when you arrive because it could impede your ability to get a shot you've been hoping for. If you are visiting a National or State park, check their websites for current conditions, road closures, and special access. This has saved me a few times.
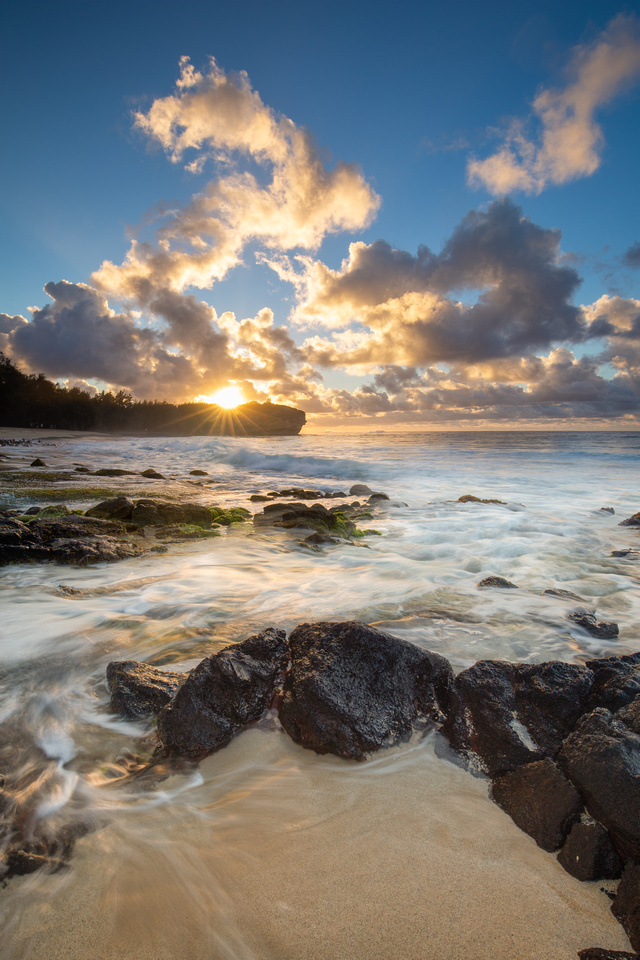
Shipwreck Beach at sunrise, Kauai |
3. Determine Where You Want To Rest Your Head
In my experience, the choice of lodging varies greatly from one person to the next. Some people are content to rough it while others desire all the comforts of home. You will likely uncover some lodging options during the research phase but it's good to ask yourself a few questions before you book anything.
- Is cost a factor? If you are looking to save money, camping is hands down, the most economical choice. Some campgrounds offer cabin or yurt rentals as well and are often less expensive than a hotel. If you own an RV, Trailer, or Camper, many campgrounds have electrical and full hookups that can make a photo trip pretty luxurious. If you are really looking to save a few bucks, check into the availability of dispersed camping at your location. These usually offer no services but are free and you can't beat that price.
- Do you want to be close to the action? I like to be as close to my shooting locations as possible, so I tend to camp at established and dispersed campgrounds. While there are hotels and lodges that offer accommodations close by, by far camping cant be beat for it's proximity to good shooting locations.
- Do you like the comforts of home? Unless you own an RV or Trailer, you might miss out on some comforts of home without a nice hotel or lodge, such as a soft bed, a flushing toilet, and a hot shower. If you know you wont be comfortable or happy without these comforts, it could distract you from getting your best shots - which is the whole reason to be out there - isn't it?
- Do you need or want your technology? If you need wifi to work or communicate, or you want to watch TV, a hotel or lodge might be your best option. I have camped in places with a decent cell signal that I can use to create a wifi hotspot, but it's not always reliable or terribly common depending on where I am traveling. If you are camping at an established campground, you can find out if they have wifi or cell reception before you book, but if this is critically important to you, you might want to consider a hotel or lodge.
- To you value peace and quiet? There are no guarantees you will get this at any location you stay, but I can tell you that when I have camped at dispersed camping areas, they have tended to be the least crowded and most peaceful locations.
- Do you just need to get a few zzz's while passing through? For anyone who is curious about overnight parking at Walmart, Rest Areas, or other like locations, I feel like I've slept at all of them and they are good no frills stops when I just need to stop - sleep - then go. I have not yet had an experience where I felt unsafe, but let's face it - there's a higher safety risk staying at one of these locations. I've also had a couple of experiences where the noise level was high due to big rig's or people talking really loud so if you need to go this route, I recommend a good pair of ear plugs.
|
|
4. Create A Shot List
This one is super easy! As you are building out your trip plan, document the subjects and locations that you want to photograph - basically - a shot list. This shot list is a great way to prioritize what is most important to you and to start thinking of different viewpoints or creative approaches you want to employ to capture something unique. There's nothing wrong with capturing the iconic shot of Half Dome that you see in thousands of images online, but why not consider different compositions before you leave so you can maximize the potential for unique and different photos that could set you apart.

Coquille River Lighthouse, Bandon Oregon - this is a shot I had on my wish list for this trip. The weather and tides cooperated to create the image I had been envisioning |
5. Create A Plan (And A Backup Plan)
While you are building out your trip itinerary, you can make an outline of possible shot locations within the larger destination. It is a good idea to prioritize these shots for sunrise, sunset, etc. then create a Plan A and B for each shooting session. When you find yourself unable to execute on Plan A (and it will happen) you can quickly pivot to Plan B and still be productive.
By the way - Plan B might be shooting at the same location you shot the previous day, and that is okay. No two days are the same, so if that is the best option, it's best to get additional shots than to waste the opportunity.
Quick Tip: I created a template for planning my photo trips over a decade ago and I still use it. It reminds me to capture details like sunrise, sunset, tide height, and of course back-up plans.
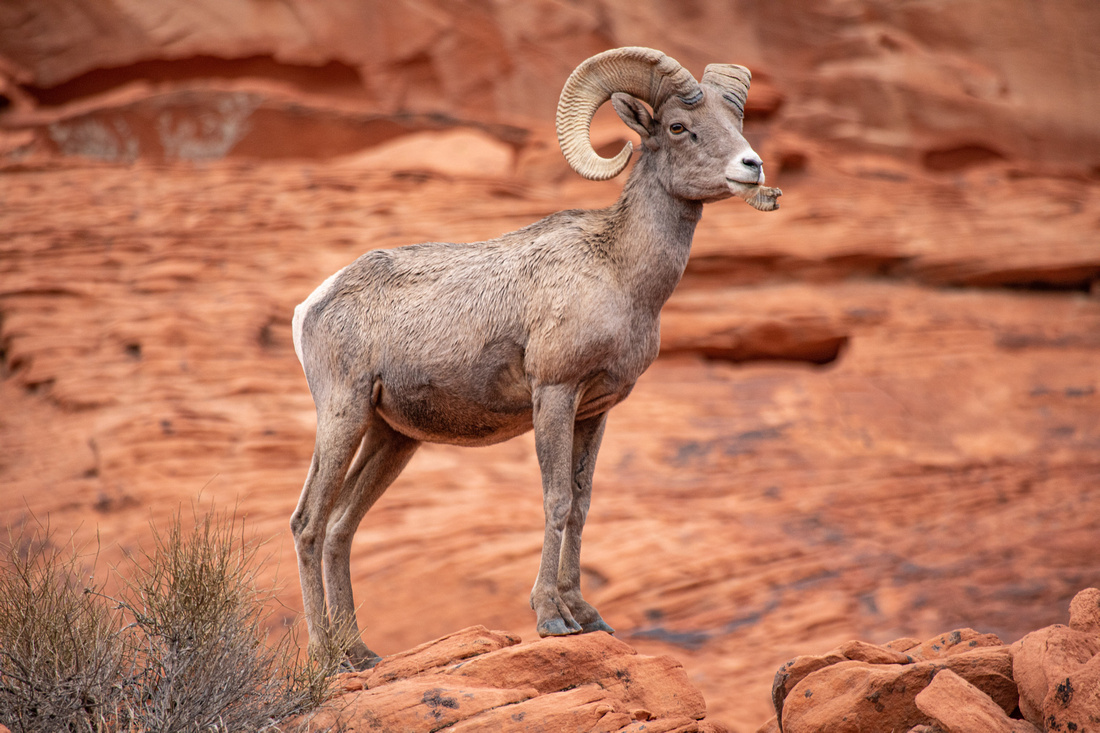
Peninsular Big Horn Sheep, Valley of Fire State Park - Plan A for this sunrise was to photograph the sun through one of the arches but light rain forced me to Plan B, which was to shot the canyon walls in overcast light. This Big Horn Sheep rewarded me with some very nice modeling. |
6. Plan Your Route
Assuming this is a road trip, do you prefer, or need to get to your destination quickly, or would you rather take in the scenery? If time is of the essence, the freeway might be your best choice, but if you have a little time, scenic routes are - well, more scenic, and can afford you some unexpected photo ops. You never know; this could inspire a future photo trip.
Do you prefer, or need to travel the same way back to that you traveled in? If you want to get more bang for your buck, a loop route will take you through new areas that you didn't see on the way in, and as above, can create additional photo opportunities. I like to plan a trip that leverages all viable locations between home and the larger destination and found loop routes to more conducive to this. Plus, you get to see something new and different each day of the journey.
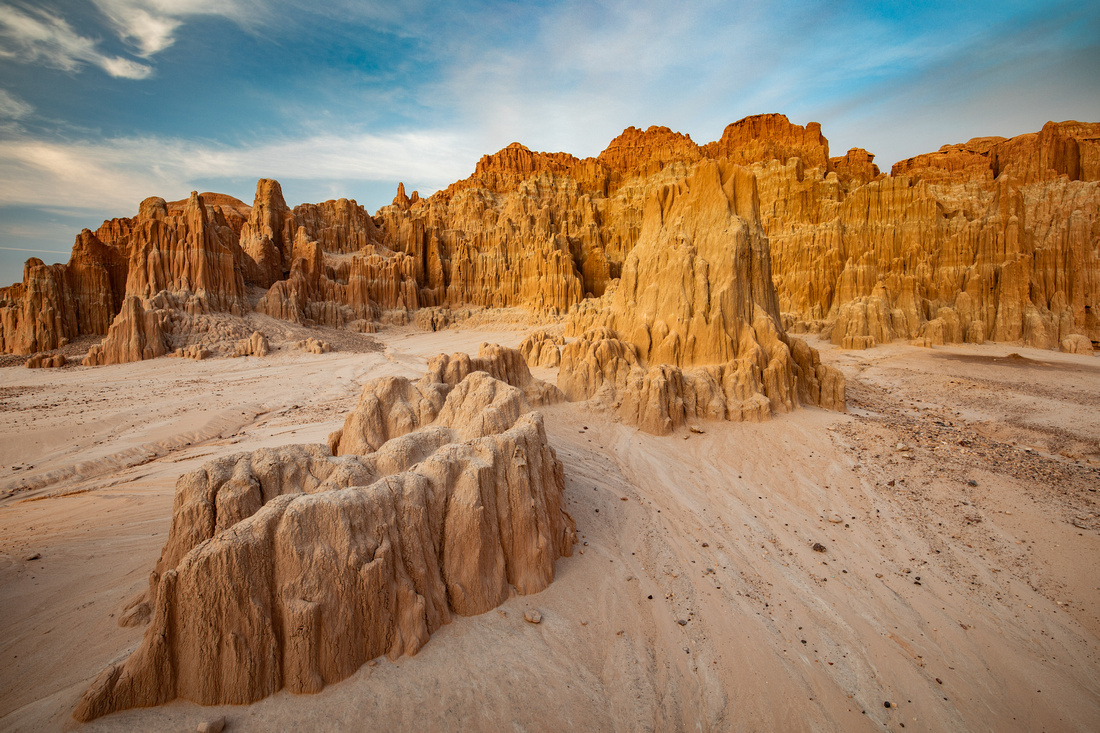
Cathedral Gorge State Park - I planned a loop route for a trip to Yellowstone that took me through several Nevada locations I had not been to in many years, including Cathedral Gorge. |
7. Assess your gear
Before you head out, think about what you need for the types of photos you plan to take. If the trip is focused on landscape photography, you probably want to bring your wide angle lens(es), filters, a solid tripod, and remote shutter release. What about wildlife? You might want to pack your best telephoto lens(es), a beanbag, or monopod perhaps. No matter what, you need to bring enough battery power (and charger), memory cards, and cleaning gear.
If space and/or weight are a factor, you might have to make some tough decisions about what to leave at home, but as long as you pack the gear that gives you the best chance of capturing the images you are targeting, you will start off on the right foot.
If you have a little freedom to pack additional gear, it's still a good idea to prioritize. It's nice to have options, but only if you need them. Plus, additional gear can mean additional clutter that wont help you on your journey. Theft is always on my mind when I travel so I tend to take only what I know I'll need. I have not yet run into a situation where I wished I had brought something that I opted to leave at home.
In addition to photo gear, don't forget about rain and water protection, like a camera cover and waterproof bag.
Before I leave for a trip, I do a quick check of everything I am packing to make sure it's clean and working as expected, that I have charged all batteries, and formatted memory cards. There's nothing worse than arriving at your destination just as the light is getting good only to find your camera's battery is about to die and all the spares are not accessible.
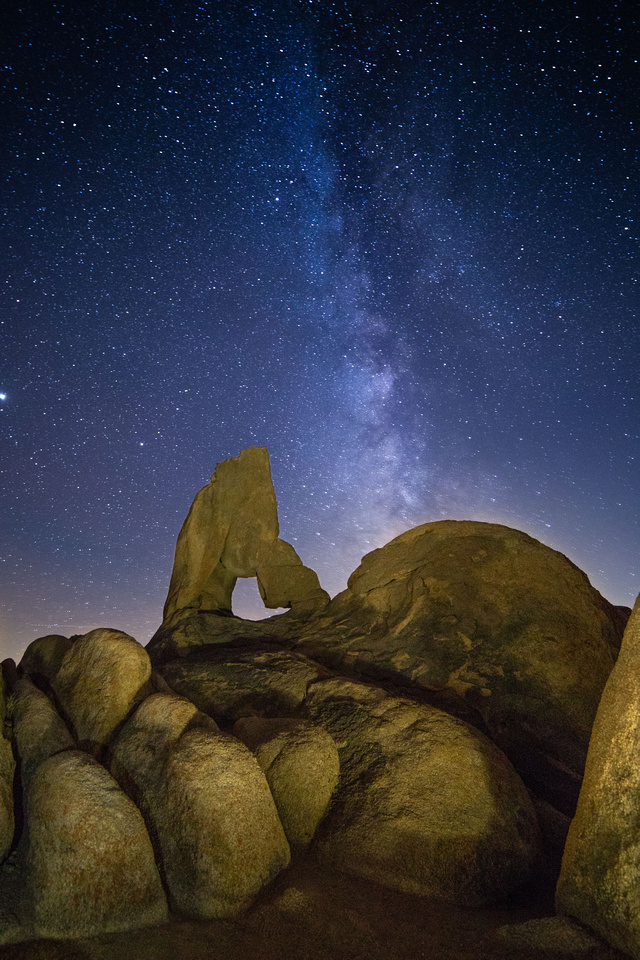
Boot Arch, Alabama Hills - I knew I would be doing night photography on this trip, including a stop on my last night through Alabama Hills, so I packed my best night lens - a 14mm Rokinon. |
8. Create A Communication Plan
It is always a good idea to leave a copy of your trip plans with someone back home that includes all the details of your trip, as well as having a communication plan. This doesn't need to be fancy or complex. For example, you might agree to send a text or call once a day at a certain time so someone back home knows you are okay.
If cell service is unreliable, you might also opt for a one way satellite communication device like SPOT Satellite Messenger. My very thoughtful co-workers bought me one of these for Christmas several years ago and I still use it when I'm traveling. It allows you to send up to 2 pre-formatted messages to anyone of your choosing by text and/or email. It also has an emergency help button that will deploy emergency help to your location if needed. This device has provided me and my family peace of mind and I would recommend it to anyone.
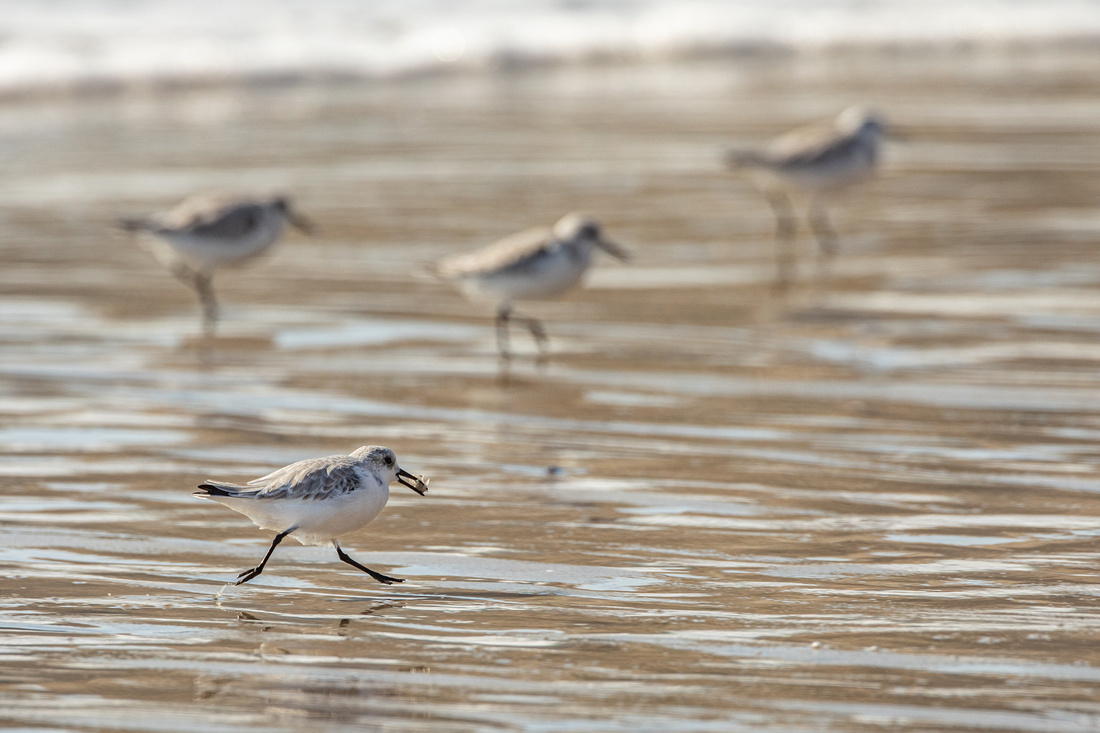
Sanderlings foraging in the surf, Ano Nuevo State Reserve |
There you have it! Eight easy tips for planning your next photography adventure. I hope these have provided some good information and insight into the planning process and that you enjoy planning your next trip as much as I do.
