In the Zone at Big Sur
This blog entry is a little different from how I have historically written them. I've written my usual trip report but I've also added photo notes for anyone who might be interested in photography. I would love some feedback on this approach.
Pfeifer Beach sunset: Trip Notes
This trip covers Big Sur up to Half Moon Bay. The drive straight to Big Sur is 4 hours via I-680. It’s not a very inspiring drive but it is an efficient route.
My sunset shoot was to be at Pfeifer Beach. The beach has a large rock outcropping with an arch in the middle. From mid-December to mid-January, you can actually photograph the sun setting through the arch. Due to life and weather, I couldn’t make that work this year but I thought it would still be a good location to shoot and scout so I could that sunset next year.
When I arrived, the beach was mostly empty. I scouted a bit and selected my spot, then I waited for the light to improve. It was pretty cloudy when I arrived so I wasn’t sure if I would get anything but at least I was enjoying a nice view. After about 30 minutes, I heard voices and looked over my shoulder. I saw 20+ people walking right towards me, and they had cameras. I quickly grabbed my gear and set up so I could secure my spot.
This was a large beach with plenty of spots to shoot from but these people descended on me like I had the vantage point of a lifetime. One guy set up so close to me that his tripod leg was touching mine. After a few minutes, I realized these people were all together and it looked like they were shooting a low budget film. For the next 90 minutes, many of these people wandered into my view, stood there, chatted, and snapped selfies with their phones. I’d be lying if I said I wasn’t thoroughly annoyed but it is a public beach so they had as much right to be there as me.
Despite all crowd, I was able to get a few shots without anyone walking into the frame. I’m hoping next time I can shoot the sun through the arch – and that the filmmakers have moved on.
Photo Notes
One of the first lessons I learned in photography was how to make a proper exposure using the zone system. I recently took an outstanding course through the Rocky Mountain School of Photography and they started the course with a review of the zone system. I thought this trip would be a good opportunity to formally apply the zone system and write about my experience – kind of a “back to basics.”
There are a lot of details I am not going to cover here but if you would like to learn more, please check out this article in Outdoor Photographer.
For any subject you photograph, you need to consider exposure and what is most important to you in the scene and go from there. For me, in this scene, it was the highlights. So what did I do?
-
I spot metered on the clouds. I knew I wanted those to render as a highlight but retain detail. That means I wanted those 1 stop above an average tone (18% grey or zone 5) which gave me an exposure of: F16 at 1/8 second at ISO 50.
-
I then spot metered on the rock, which was much darker. I could tolerate this being up to 2 stops below an average tone to retain detail, which it was, so I knew I was good to go.
-
I did end up pulling up the shadows a bit in Lightroom post process, but that is okay. The camera will never capture the range of light that our eyes do, so using the tools available to help render the scene the way you saw it isn’t a bad thing.
-
This is a snapshot of my LCD screen for the first photo below. Note the image looks like there is not detail in the sky. I don't rely on that. Rather, I look at the histogram to the right of the image. I want to make sure the "mountain range" doesn't touch the left edge (that's your blacks) or the right edge (that's your whites) unintentionally. I pretty much always leave my LCD on this view so I can verify this right away.
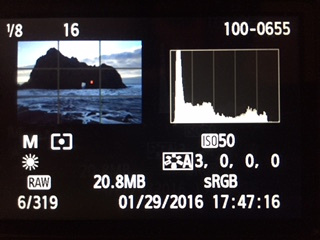

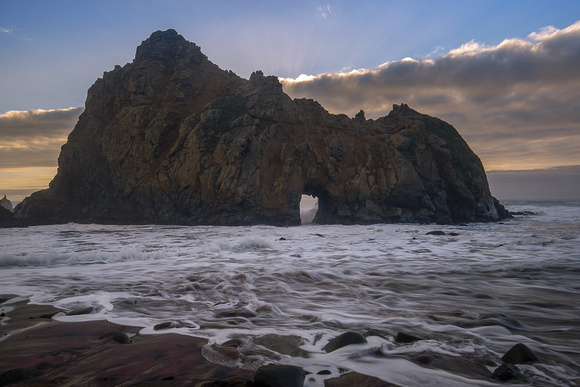
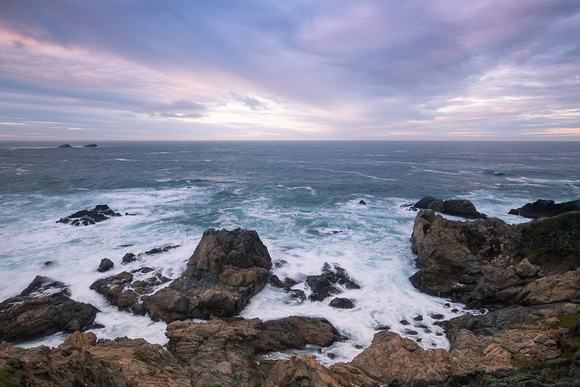
28mm, ISO: 50, Exposure: f/16 at 1/8 second

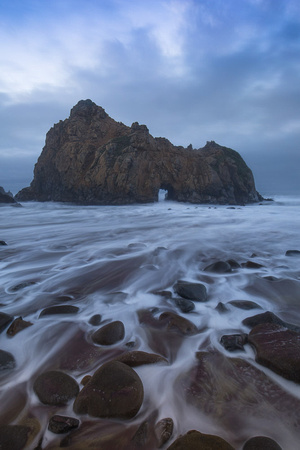
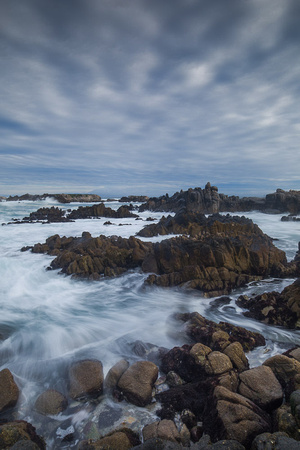
28mm, ISO: 50, Exposure: f/19 at 7/10 second
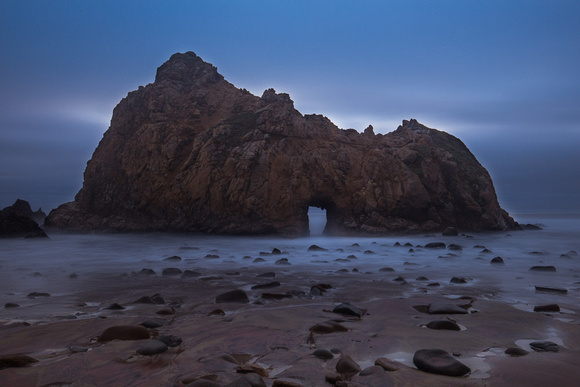
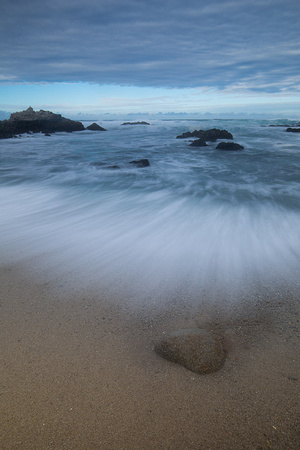
19mm, ISO: 100, Exposure: f/19 at 4 seconds
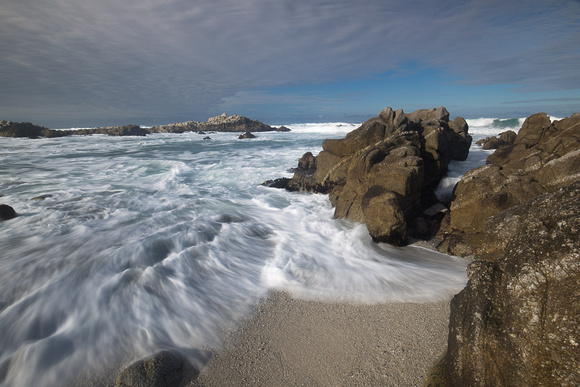
26mm, ISO: 200, Exposure: f/16 at 30 seconds
Garrapata State Park sunrise: Trip Notes
After a delightful evening at the Subaru Inn, I started my morning at Garrapata State Park. I had scouted a location on the way to Pfeifer Beach but calculated that the tide would be too high to access it at sunrise so I opted for a location that I had been to before (also known as Gate 7).
Little did I know that state park system installed some fencing since last year that prevented me from accessing this beach as well. I know they did it for my safety but c’mon man.So then I was on to plan c, which was another location at Garrapata (also known as Gate 4). It was okay but it was no Gate 7. I love Gate 7.
This wasn’t a terribly exciting location because there truly is no beach access so I didn’t linger. On my next trip, I’d like to invest an afternoon just scouting every gate access and noting the tide height for future trips.
Photo Notes
This scene did not have a high level of contrast so I figured I could meter on the ocean (which is roughly Zone 5) and probably get a good exposure. I metered, took a shot, and checked my histogram.
I didn’t have any blown highlights or clipped shadows so I knew I was good to go unless the light changed dramatically.
22mm, ISO: 100, Exposure: f/16 at 1 second
Asilomar State Beach: Trip Notes
Asilomar is in Pacific Grove and since I was working my way back up the coast, I thought this would be a good morning stop. This beach is just cool. The rock outcroppings are different than most beaches I have been too and there are tide pools to explore too. The tide was high while I was there and the light was a bit high to be interesting so I mostly scouted but I took a few shots. This location is definitely on the list for sunset and night shooting next time I’m in the area.
Photo Notes
The light did change here a bit so I had to re-meter each time the sun came out then back behind the clouds again.
When I’m shooting landscapes, I’m almost always using an ISO of 50 or 100 and an F-stop of 16. Low ISO’s keep noise levels (grainy dots) to a minimum and a small aperture improves sharpness throughout the scene. So – if I walk into a scene like this and I already know I’m shooting F16 at ISO 50, the only other thing I have to adjust when metering is my shutter speed. Cinchy!
21mm, ISO: 50, Exposure: f/16 at 7/10 second 21mm, ISO: 50, Exposure: f/16 at 7/10 second
16mm, ISO: 50, Exposure: f/16 at 1/4 second
400mm, ISO: 400, Exposure: f/5.6 at 1/2000 second
El Carmelo Cemetery: Trip Notes
After Asilomar, I checked out the Monarch Grove, which contained roughly 1 butterfly, then Point Pinos Lighthouse which didn’t open until 1:00 pm.
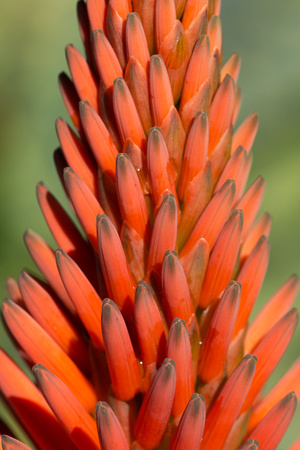
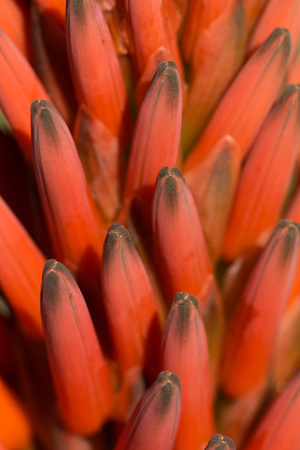
While I was parking at the Lighthouse, I noticed a Red Aloe plant at a cemetery across the street so I grabbed my gear to get a few pictures. I ended spending over 2 hours here. I love when I find an unexpected little gem on a trip. The best part about cemeteries is that hordes of people don’t tend to visit them so it’s like you’ve got this cool “park” all to yourself.
Over half the pictures I posted here are from that location. I’m going to check out some cemeteries closer to home now!
Photo Notes
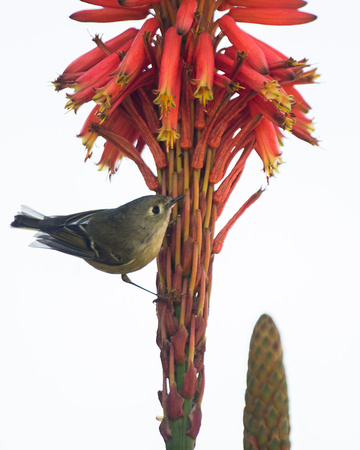
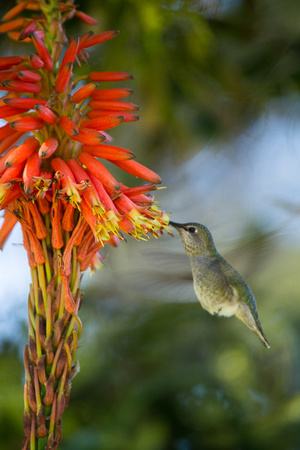
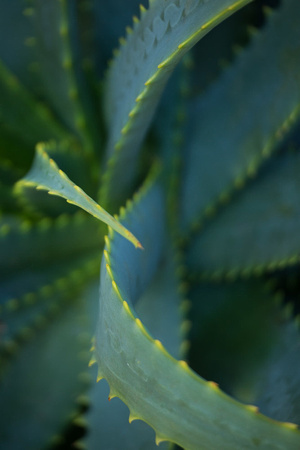
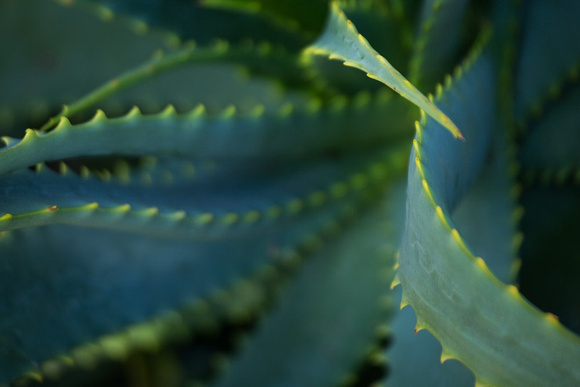
The Red Aloe plant is what caught my attention at the El Carmelo Cemetery, but so many other opportunities presented themselves while I was there.
-
Metering the Red Aloe blooms was easy. Red is the same tone as Zone 5. It’s not the color you are metering, it’s the tone, or rather the light reflected off that tone. I metered on the bloom and my exposure was perfect.
-
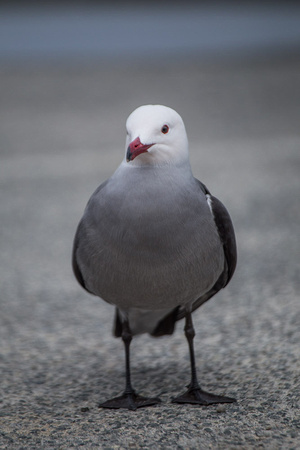
Metering on the birds was more challenging because they were attracted to the Aloe plants but some plants were in sun and some were in shade. The birds move around so quickly that it is nearly impossible to change exposure and keep up so I set my camera on Aperture priority. This setting allowed me to set the ISO and the aperture but the camera adjusted the shutter speed based on the meter reading. I typically only use this setting when photographing birds.
-
The Red Aloe leaves are also Zone 5. Just meter on the leaves and go. One note: try to keep them all in sun or all in shade though.
-
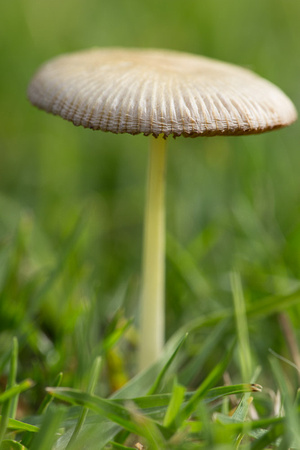
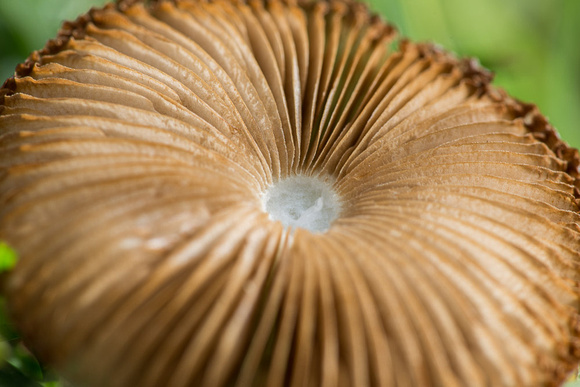
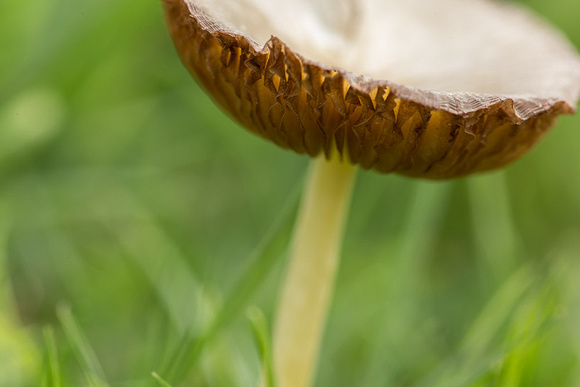
All of the mushrooms were easy. Meter off the grass. It’s Zone 5.
-
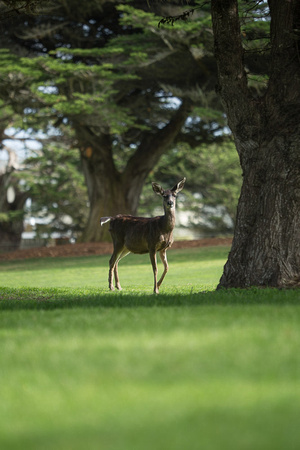
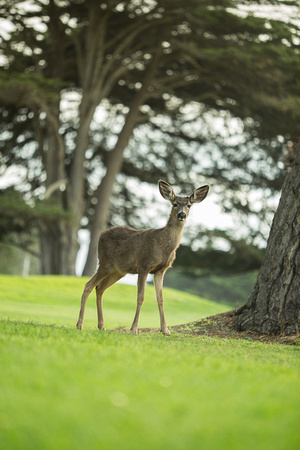
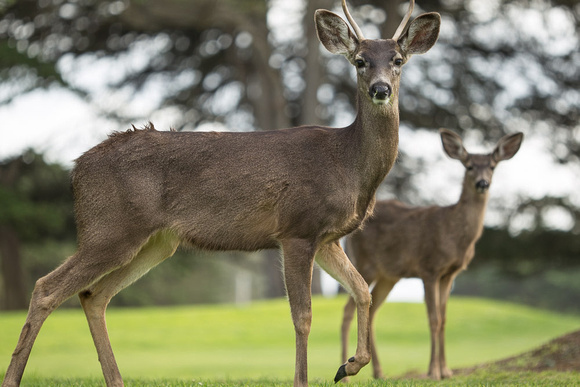
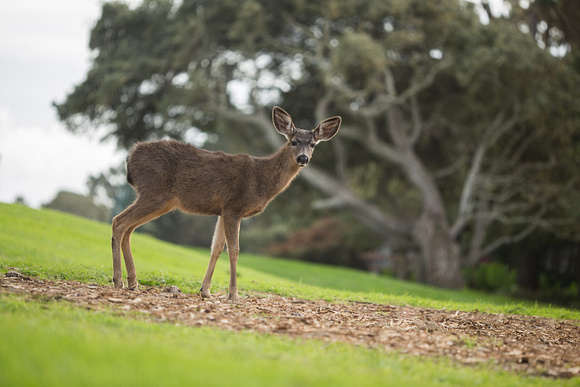
While I was shooting the mushrooms, a herd of black tail deer walked by. I was lying on the ground so I just kept the same exposure since the light on them was the same as the grass.
-
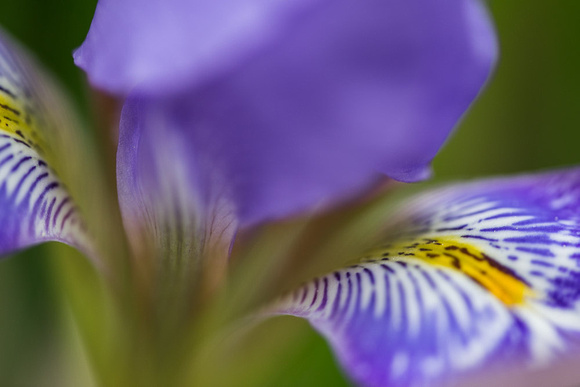
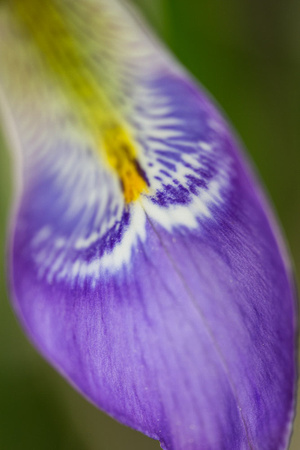
The Iris was in the shade but the petals and grass were all Zone 5, so I metered off the purple petal and shot away.
-
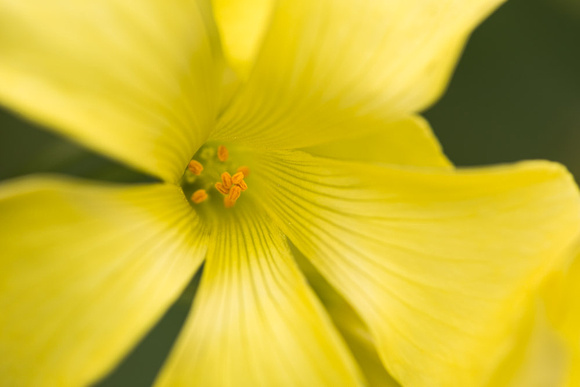
The yellow flower is 1 stop above Zone 5, so I metered off the petals and added a stop.
180mm, ISO: 50, Exposure: f/11 at 1/20 second 180mm, ISO: 50, Exposure: f/11 at 1/15 second
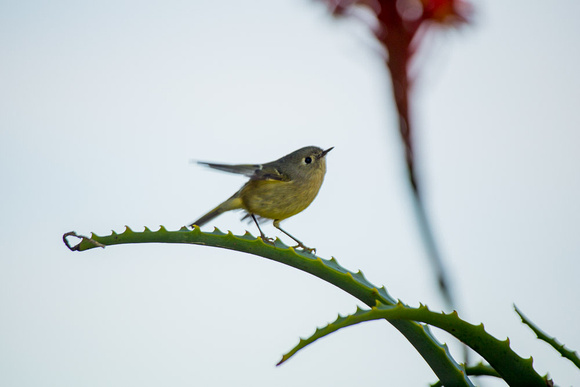
400mm, ISO: 400, Exposure: f/5.6 at 1/750 second
400mm, ISO: 400, Exposure: f/5.6 at 1/750 second 400mm, ISO: 400, Exposure: f/5.6 at 1/180 second
400mm, ISO: 400, Exposure: f/5.6 at 1/180 second
400mm, ISO: 400, Exposure: f/5.6 at 1/180 second


180mm, ISO: 100, Exposure: f/3.5 at 1/350 second 180mm, ISO: 100, Exposure: f/3.5 at 1/350 second
180mm, ISO: 100, Exposure: f/8 at 1/90 second

180mm, ISO: 100, Exposure: f/3.5 at 1/350 second
180mm, ISO: 100, Exposure: f/8 at 1/60 second
180mm, ISO: 400, Exposure: f/8 at 1/125 second
180mm, ISO: 100, Exposure: f/3.5 at 1/350 second 180mm, ISO: 100, Exposure: f/3.5 at 1/180 second
180mm, ISO: 100, Exposure: f/3.5 at 1/250 second
180mm, ISO: 100, Exposure: f/3.5 at 1/250 second
180mm, ISO: 400, Exposure: f/3.5 at 1/60 second
180mm, ISO: 400, Exposure: f/3.5 at 1/60 second
180mm, ISO: 100, Exposure: f/4.5 at 1/125 second
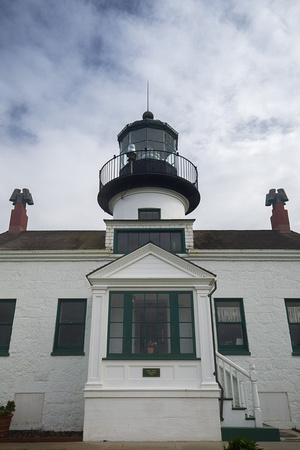
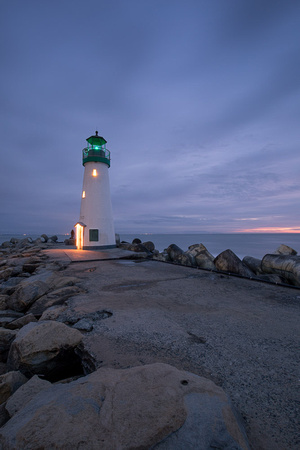
Point Pinos Lighthouse: Trip Notes
As many times as I have been in this area, I’ve never stopped at this lighthouse. It’s tough to shoot because there are a lot of distracting elements that make it difficult to photograph in its entirety. I opted for a cropped shot.
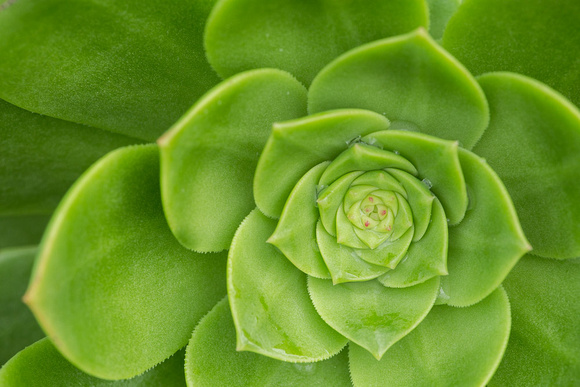
I was actually more interested in the succulents in front of the lighthouse. I love the patterns these create.
Photo Notes
For the Lighthouse, I metered off the white brick and added 1 stop. I should have added 1.5 - 2. I was distracted by those succulents and kind of rushed through getting this shot.
28mm, ISO: 100, Exposure: f/8 at 1/80 second
180mm, ISO: 400, Exposure: f/8 at 1/125 second
180mm, ISO: 100, Exposure: f/8 at 1/45 second
Breakwater Lighthouse: Trip Notes
After my delightful afternoon at the cemetery, I started to drive to my sunset location to scout. The weather was getting more grey and dingy as time went on so I thought I’d switch it up and do my sunset location the following morning (which was supposed to be partly cloudy) and go to Breakwater Lighthouse at “sunset.” I wasn’t counting on getting anything this evening given the lack of light but I can’t help but try. I’m perpetually hopeful.
Lots of people walk to this lighthouse at sunset and all were very friendly as they walked by. Someone asked me if I was trying to catch the sunset and I responded, “what sunset?”
Photo Notes
For this scene, I metered off the sky. I had to pull up the shadows of the rocks in Lightroom and warm up the colors a bit but otherwise, this is a fairly straight shot.
16mm, ISO: 200, Exposure: f/11 at 30 seconds
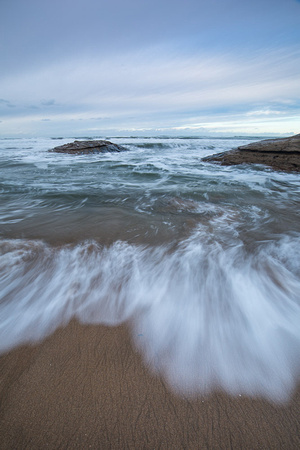
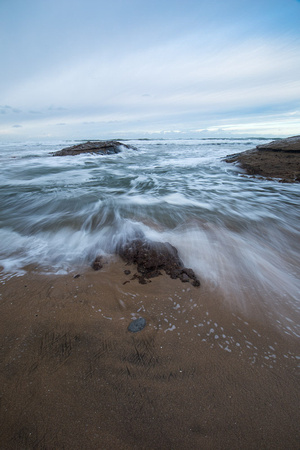
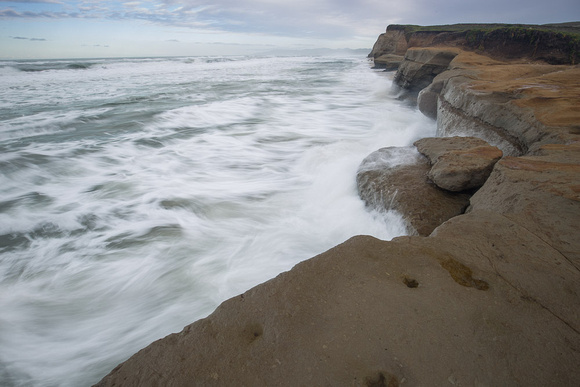
Pomponio State Beach: Trip Notes
Another night at the Subaru Inn and I woke to rain drops. Noooooo. I really wanted to get some shots at this cove so I drove to the spot anyway and sat in my car for an hour hoping the rain would ease up but it never did. I finally had to throw in the towel and start heading home. On the way, I stopped at Pomponio State Beach to try for a few shots before the 2 hour drive back. The light was still bleh but I hadn’t seen this beach at such a high tide before and it made me want to come back at sunset. I think sunset on these red cliffs would look pretty cool.
After this, I headed home.
Looking forward to the next trip!
Photo Notes
For these shots, I metered off the sand.
I didn’t have dramatic light this trip so there wasn’t a lot of contrast to contend with. That made it easier for metering and adjustments but I do look forward to more interesting light in my future trips.
Next time, I’ll focus on comparing the RAW capture and post processed images. That should be fun!
16mm, ISO: 100, Exposure: f/16 at 3/10 second 16mm, ISO: 100, Exposure: f/16 at 3/10 second
16mm, ISO: 50, Exposure: f/16 at 1/2 second
