Top tips for photographing birds in flight
Top Tips for photographing birds in flight
Text and photos by Heather Cline
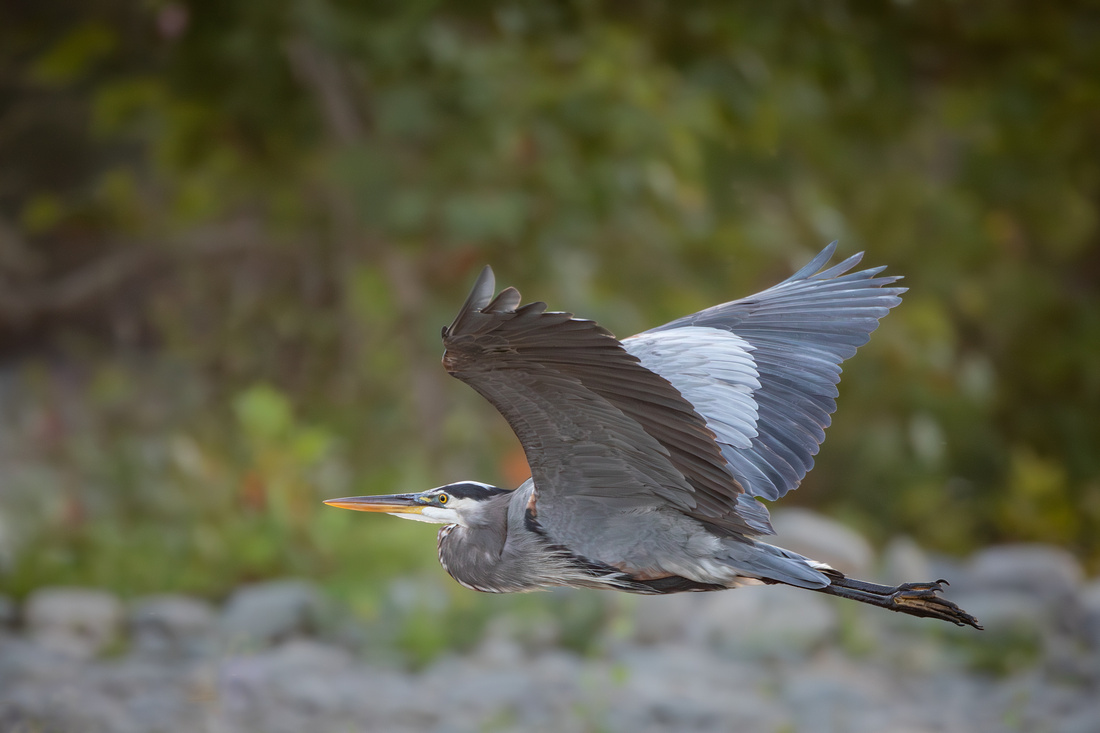 
Great Blue Heron, Effie Yeaw Nature Preserve |
Bird photography is great way to keep yourself humble. They're small, fast, and their backgrounds can change in the blink of an eye. One of the most challenging skills as a photographer is capturing good images birds in flight, but with practice, patience, and a few tips, you can master the art of capturing birds in flight.
Setting up the shot
A key to setting up to capture birds in flight starts with knowing where to go. Rivers and lakes are good options because they provide nesting and food sources for the birds. Once you have arrived at your location, take some time to study their behavior. For example, when red tail hawks are about to take off, they crouch for a second before they fly. After some time you can anticipate movements and behaviors of many species that will help improve your images.
A few other quick tips:
- Keep the wind (and sun) at your back when possible: birds take off and land into the wind.
- Shoot against clean backgrounds: this lets the subject shine rather than competing with other elements.
- Let birds come to you: birds will fly when frightened, resulting in poor shots of their backside. If you sit still and quiet, they will come to you.
- Arrive early and stay late: for both lighting and activity, you can't beat being out near sunrise and sunset.
- Start with slow flying birds: when you are first learning, it's easier to practice (and capture) slower flying birds like egrets, herons, and gulls.

Glaucous-winged Gull, Effie Yeaw Nature Preserve |
Depth of Field
Keeping the subjects eye sharp is important in all wildlife photography. If you want to maintain sharpness from the eye to the tail, you may want to shoot at F8 or slightly higher. Blurring out the background is helpful for ensure the focus stays on your subject, so going much higher than F8 may reveal too many details. Having said that, there are times when having the birds environment in focus may be desirable for telling the story. The good news is, you can experiment with different apertures to achieve the depth of field that results in the best image possible.
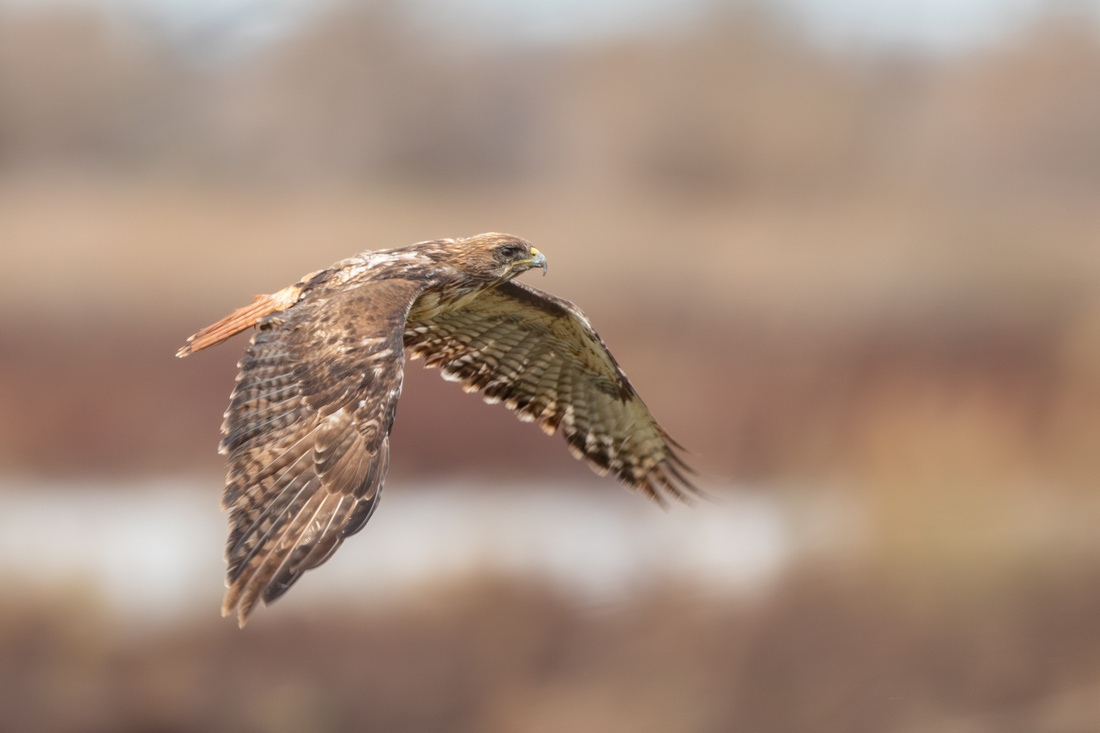
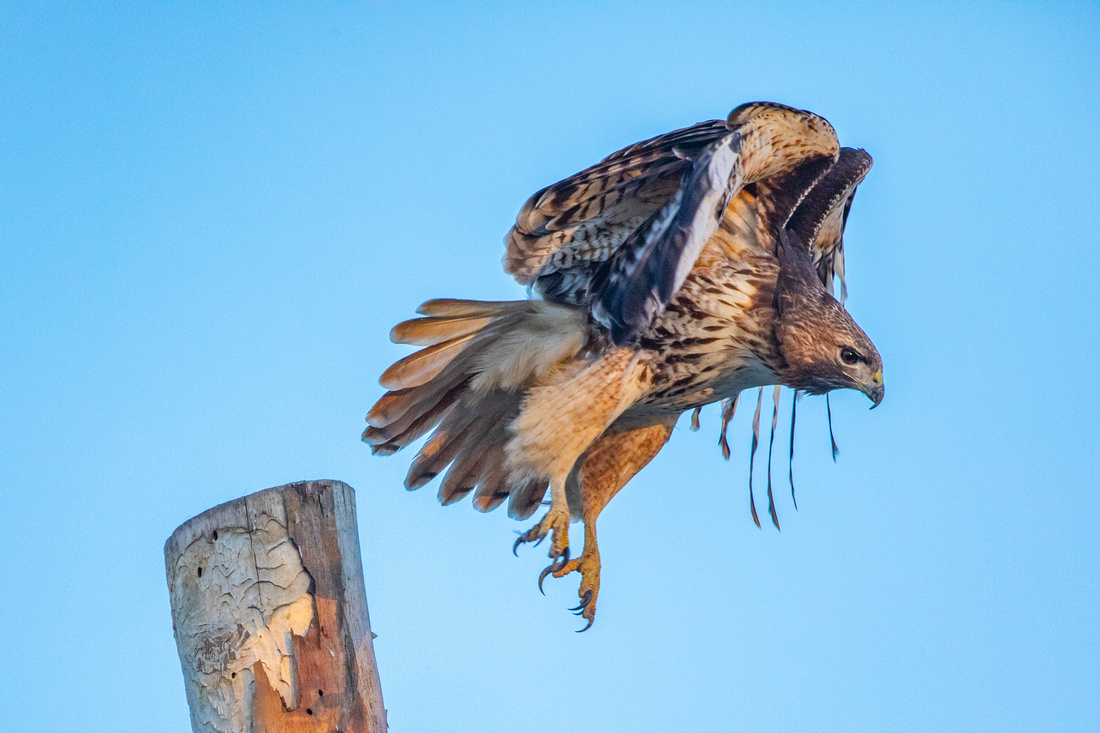
Red tail hawk, Gray Lodge Wildlife Area |
Shutter speed
The decision of which shutter speed to use will depend entirely on what you are trying to accomplish. As with any type of photography, you will begin to assemble compositions while in the field and those compositions may demand different level of sharpness. If you are looking for tack sharp images, a higher shutter speed is needed. Think 1/2500 or higher for fast subjects. This may mean bumping up your ISO and/or using a wider aperture. You can also experiment with slower shutter speeds to capture blur and create more abstract results.
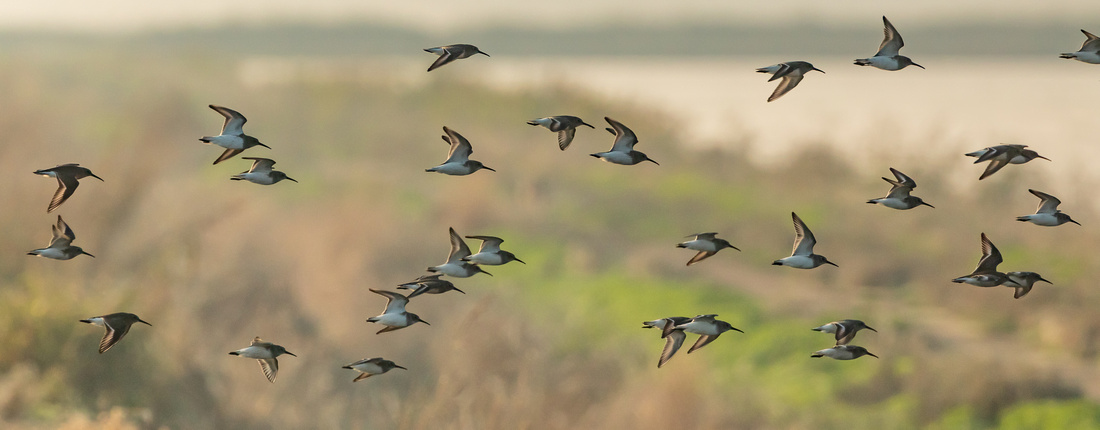
Spotted Sandpipers, Woodbridge Ecological Reserve |
Tripod vs Handheld
Depending on the weight of your lens, you may find it easier to track birds by handholding vs using a tripod or monopod. It is easier to swing around and track a bird without the nuisance of tripod legs getting in the way or causing a tripping hazard. Of course, if your lens is on the heavy side or you plan to be in the field for a while, using a tripod or monopod will reduce fatigue on your muscles and ensure your camera remains steady. I use a tripod most of the time, but I must admit, I've been toying with the idea of buying a monopod to increase mobility.
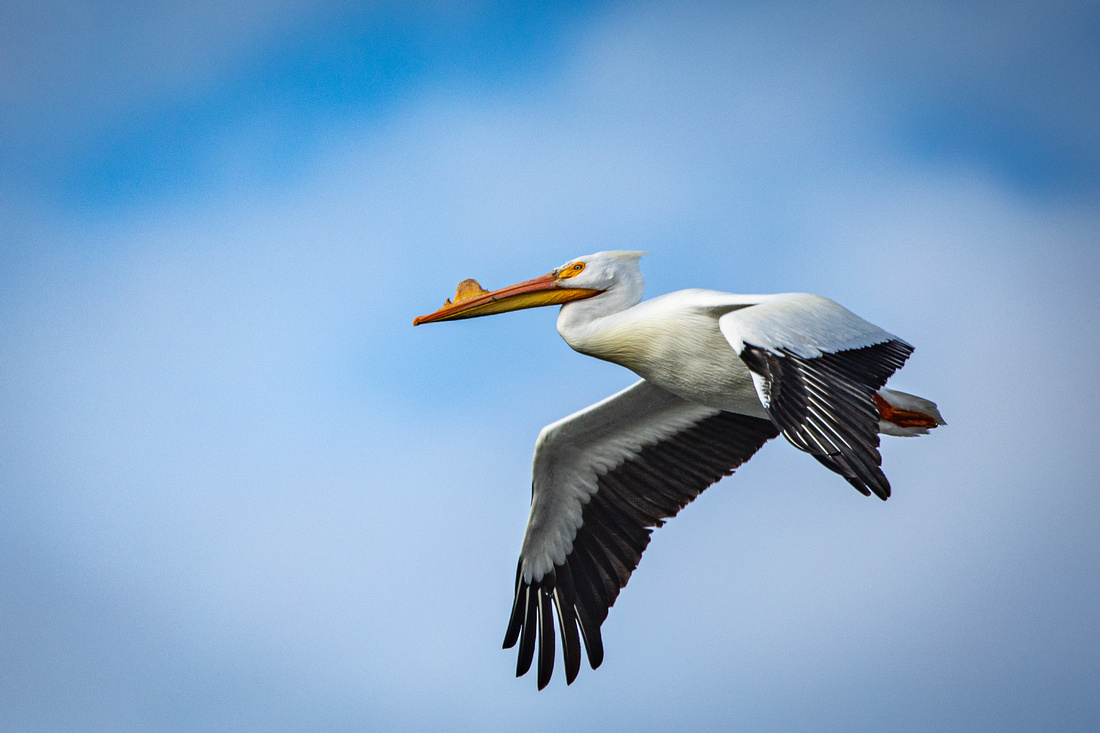
American White Pelican, Lake Isabella |
Composition
Creating dynamic compositions with stationary objects is challenging enough, but throw in moving targets and you really have your work cut out for you. Fret not, over time, it gets easier. There are a few compositional rules that you can leverage to improve the end result. The rule of thirds is a tried and true approach. Imagine you have a tic-tac-toe board over the viewfinder. You want to place the bird in one of the intersecting quadrants. It's also a good idea with any wildlife imagery to put more space in front of the subject than behind it. Finally, when the opportunity presents itself, try getting multiple birds in the shot. Odd numbers seem to be more pleasing to viewers than even numbers.
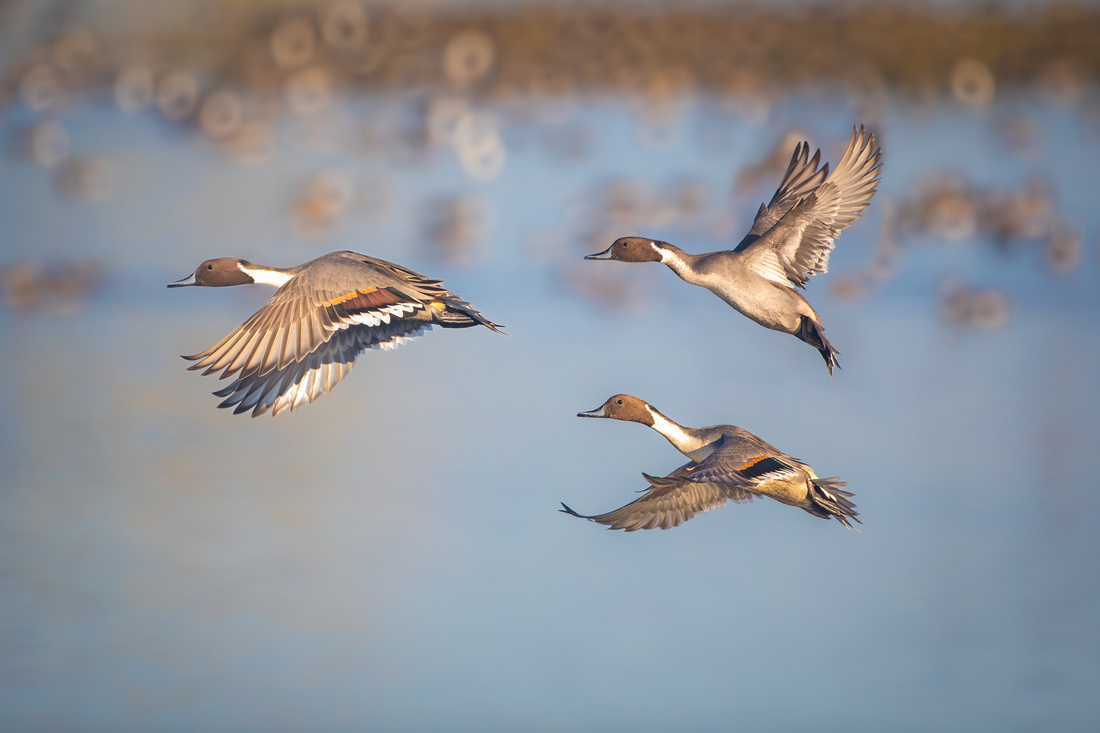
Pintail ducks, Sacramento National Wildlife Refuge, Llano Seco Unit |
Perspective
One of the difficulties with photographing birds is that they tend to be above your head, leaving you with one option: shooting their underside. This can make for some pretty average images. If you are able to position yourself higher than ground level, for example, on a hillside, you have a better chance of getting images where you are eye level with the subject. Another way to capture them at eye level is to position yourself near where they will be taking off so you have a good chance of photographing them closer to your eye level before they get too high in the sky. This allows you to capture their eyes which is an important aspect of connecting the viewer to the subject. It allows improves your chances of capturing good detail in their feathers.
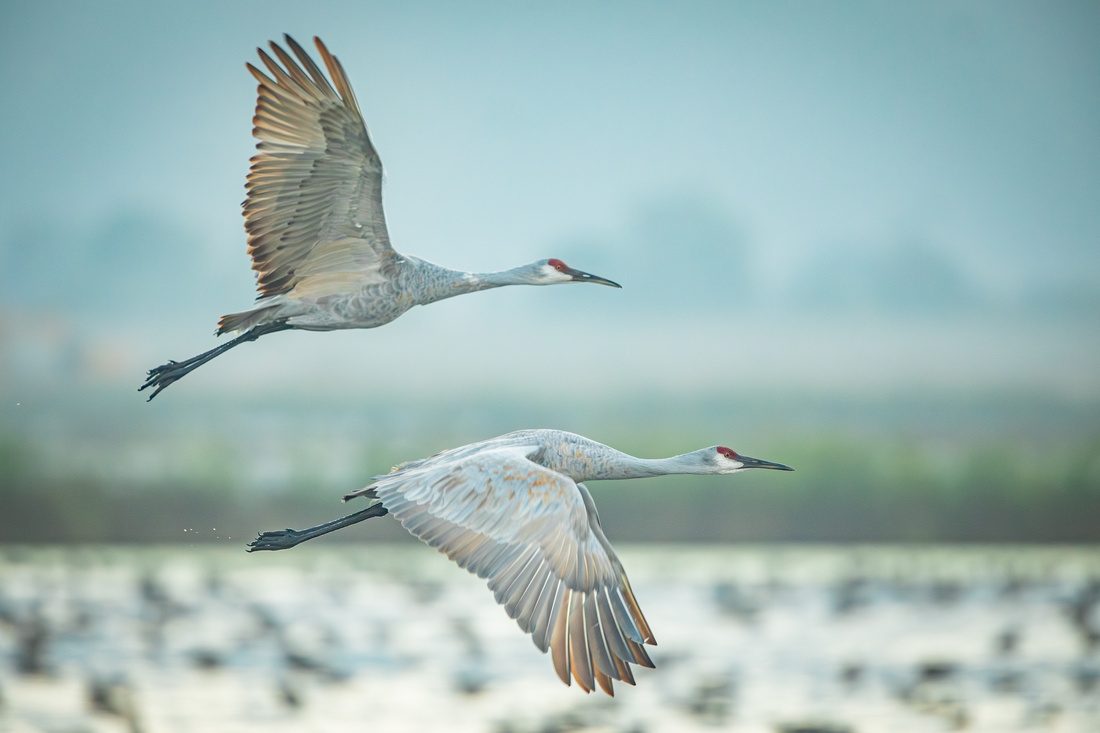
Sandhill Cranes, Staten Island |
Auto focus
I don't know anyone who is so good that they can capture sharply focused birds in flight by manually focusing their lens. I am sure this person exists - I just haven't met them yet! It goes without saying that using auto-focus will increase the number of keeper images simply by ensuring they are in focus. There are a few tips you can utilize to improve your focus outcomes as well:
- Pre-focus on where you expect the flying bird to be. If they are perched on a tree snag, you can pre-focus and wait for them to lift off. In contrast, if you have been watching a birds activity and anticipate they will land in a certain spot, you can still pre-focus on that area and capture them as they come in for a landing.
- Setting your camera to continuous high-speed will allow you to capture many frames per second just by holding your finger on the trigger. You will likely delete some of these shots but all you need is one, and this technique increases your odds.
- Using AI focus makes it easier to maintain focus once you are locked on the subject.
Red tail hawk, Sacramento National Wildlife Refuge |
Panning
Panning is a great technique to practice because it can generate creative results. To get the bird in sharp focus, and blur the background you must mirror the speed of the bird as you pan. You can also try slowing down your shutter speed to create abstract images. Panning takes a lot of practice. Sunrise and sunset are good times to go out and test this skill because birds are doing more lift offs and landings, giving you more chances to try.
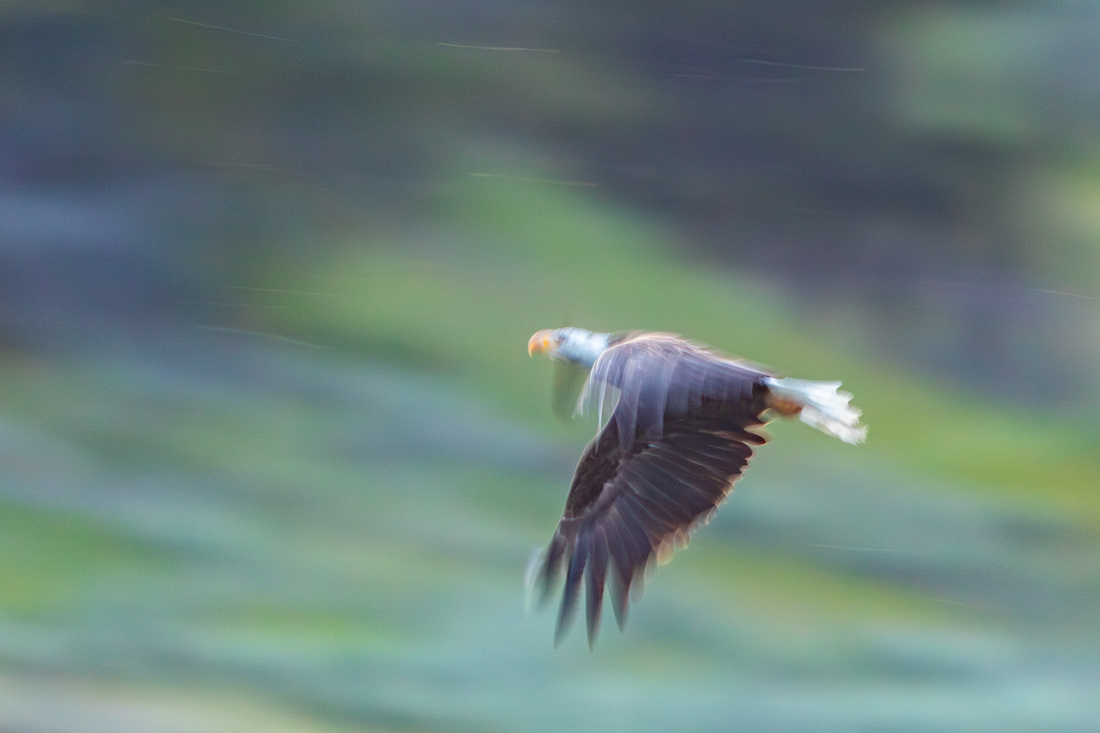
Bald Eagle abstract, Yellowstone National Park |
Practice
It takes a lot of practice to become proficient at capturing birds in flight. There is simply no replacement for this, but there are likely opportunities around the corner - even if the birds you are practicing on aren't the most exotic or exciting, they are happy to provide you lots of chances to get a good shot. Getting out to practice also holds the benefit of being able to observe birds in their natural environment. Each trip out, you will notice more and more behaviors that will help you on your next trip.
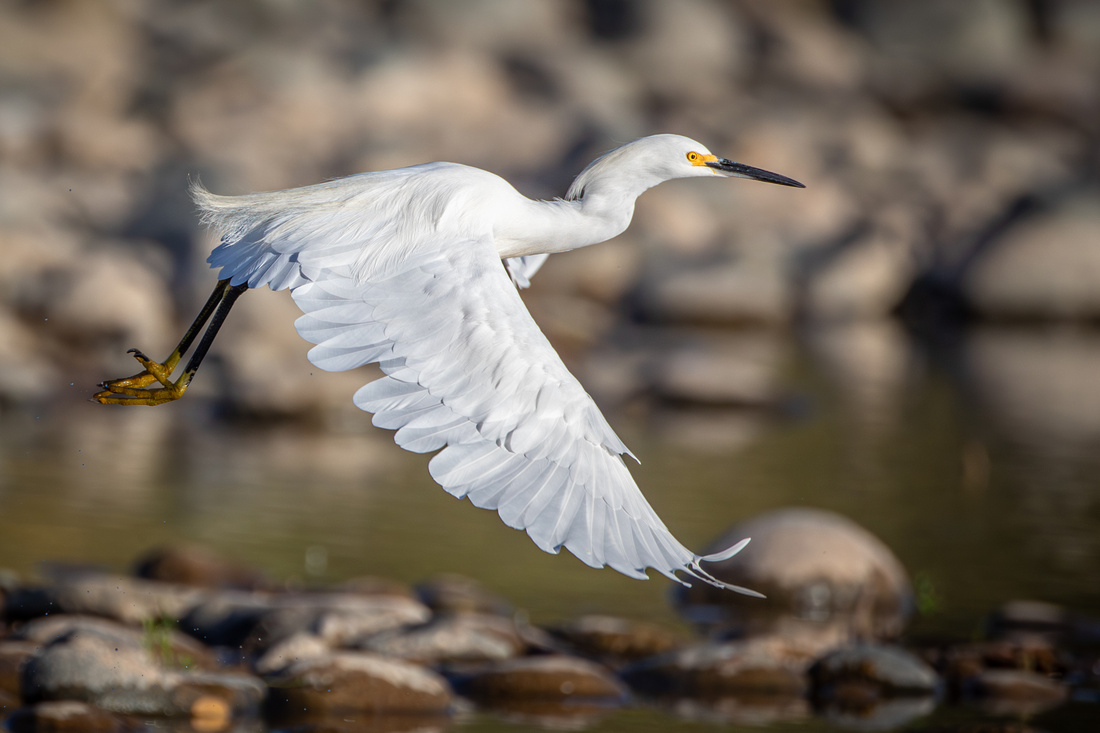
Snowy Egret, Effie Yeaw Nature Preserve |
I hope these tips and techniques will provide some benefit when you venture out on your next photo excursion. Happy shooting!
