High Dynamic Range
High Dynamic Range
Text and photos by Heather Cline
Let's pretend you walk up on a sweet landscape, pull out your camera, snap a few photos, and walk away praising yourself for being so awesome because not only did you find, but captured what is sure to be a stunning photograph. Then later, when looking at your images, you notice your sky is completely blown out or your foreground is a black blob. Sucks doesn't it?
Now, if you have been shooting for a while, you're probably paying pretty close attention to the light and shadows and making decisions about how to handle them. Depending on the situation, you may decide you are willing to sacrifice details in the highlights to retain details in the shaded areas, you may decide the opposite - to sacrifice details in the darker areas to ensure the highlights aren't blown to a snowy white, you might decide to pull out a graduated neutral density filter to get the best of both worlds. . . or, you might decide this is an excellent candidate for High Dynamic Range.
High Dynamic Range (HDR) refers to bringing the lightest and darkest areas of an image into a single photo while retaining detail. Cameras are not equipped to capture the full range of light and shadows that the human eye is capable of seeing. Fortunately, digital photography has allowed us to capture multiple images of the same scene and bring them together using processing tools, such as Photoshop and Lightroom, to create a more balanced image.
When HDR first came about, people got a little nuts. Images looked a little over processed and lacked contrast. Because of this, I resisted using HDR tools for years.
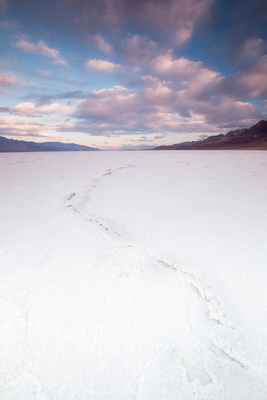
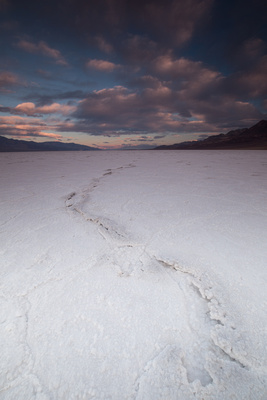
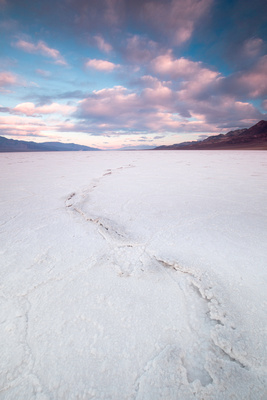
Technically I had been applying HDR manually all along by merging a bright sky from one photo with a darker foreground in another to balance out the scene, but I didn't consider myself to be an HDR'er. See example below from a sunrise at Badwater in Death Valley.
|
Sky from this exposure |
And foreground from this exposure |
Created a balanced image |
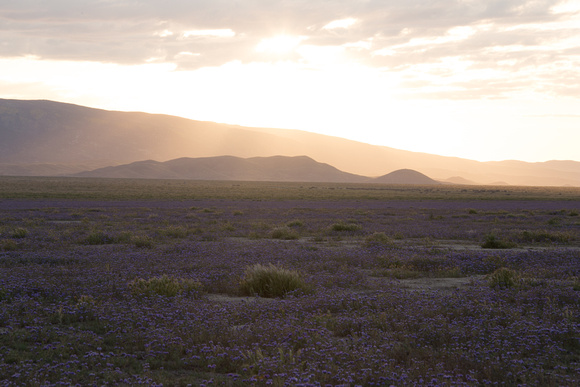
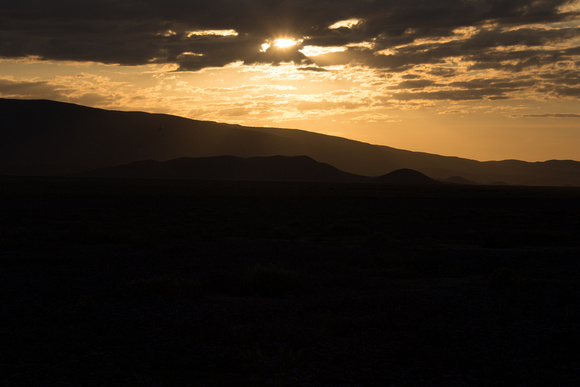
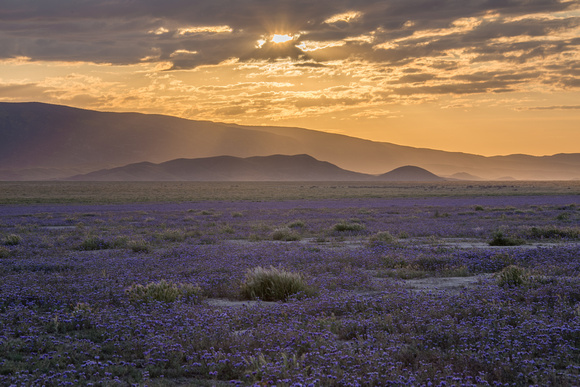
I finally started officially playing with the HDR feature in Lightroom and realized how quick and effective it can be at merging multiple photos into one, while retaining detail in both the highlights and shadows. The light in the flower field in Carrizo Plains below was super challenging. I wasn't sure I'd be able to pull any images out of these but the HDR feature was pretty effective.
|
Exposure for shadow details |
|
Exposure for highlight details |
|
Final merge |
It doesn’t always work well, but when it does, it’s a real time saver.
Here’s how you do it in Lightroom:
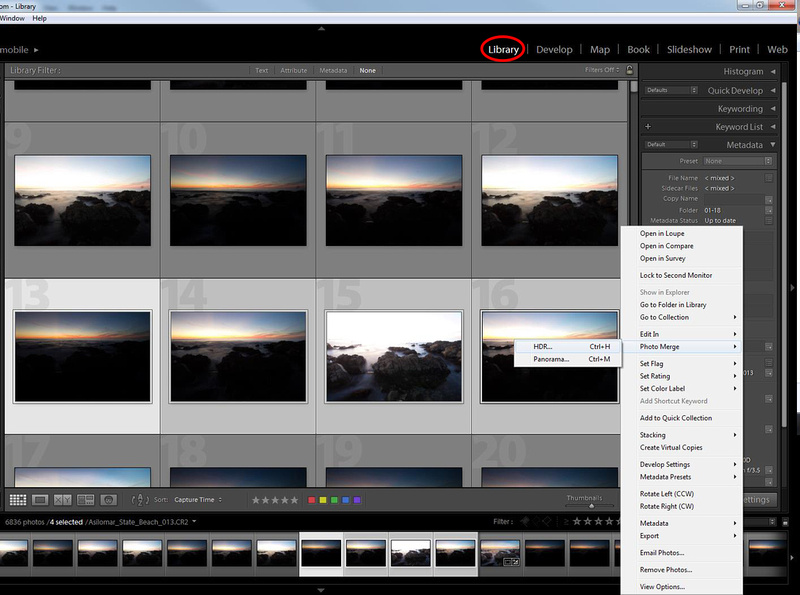
While in Library Mode, Select the images you want to merge. Then right click, selected Photo Merge > HDR. Lightroom will merge the images and provide an output image that you could continue to edit by navigating to Develop mode.

You can also do this in Photoshop:
I use Lightroom almost exclusively so I haven’t upgraded to the latest version of Photoshop, so these instructions are how to create an HDR image in CS6.
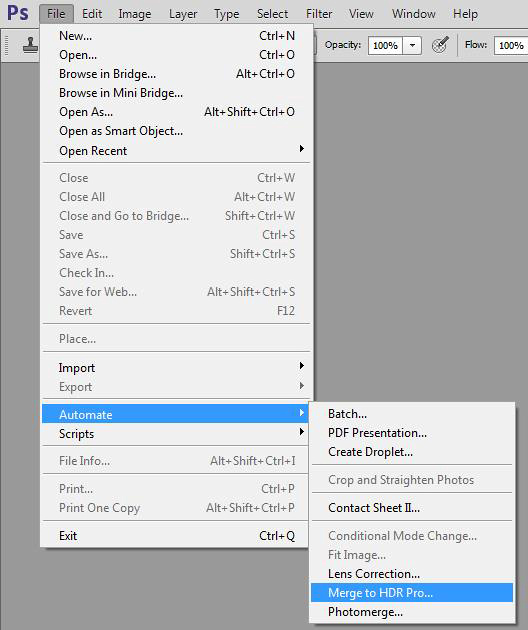
With Photoshop open, go to File > Automate > Merge to HDR Pro.

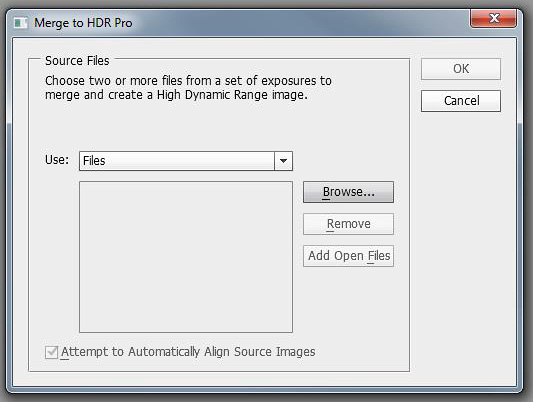
A pop up box will appear, where you select which files you want to merge. Once the files are selected, select OK.

From there, Photoshop will build the layers in front of you. Then you apply fine tuning as needed.
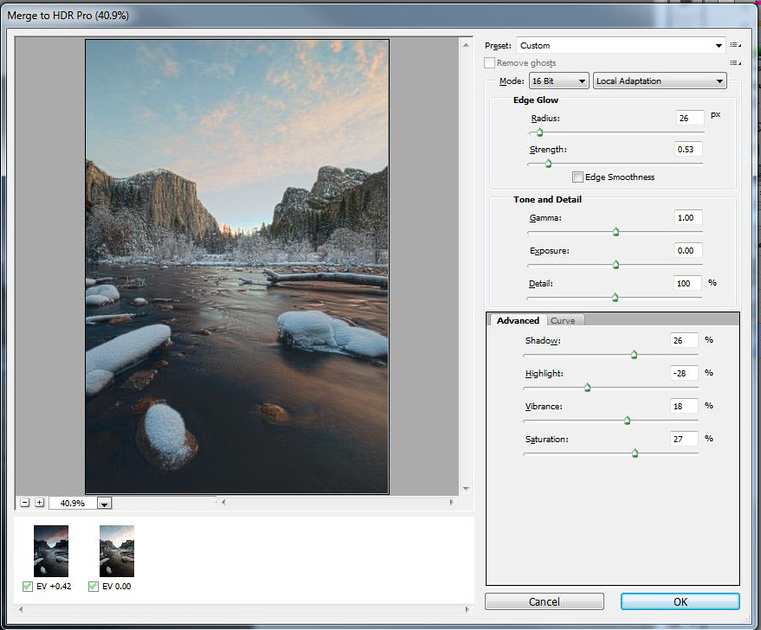

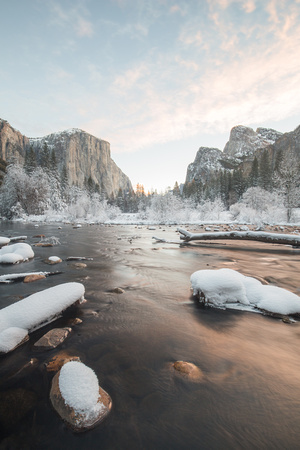
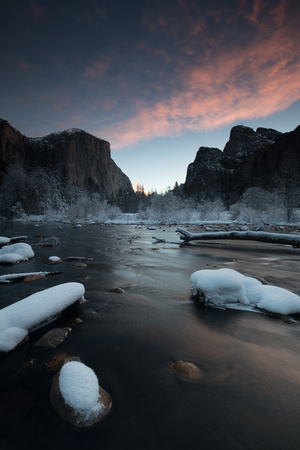
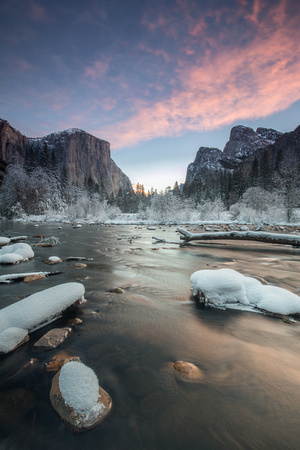
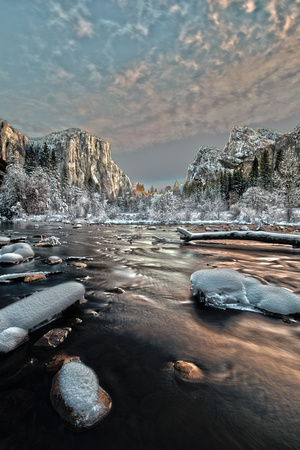
There are presets that you can choose to apply all kinds of looks to your merged image. I’m not a big fan of most of them, but the “Scott5” preset has a metallic look that is interesting. I used it on this photo of Valley View in Yosemite.
|
Exposure for shadow details |
|
Exposure for highlight details |
|
Final merge |
|
Final merge with "Scott5" preset |
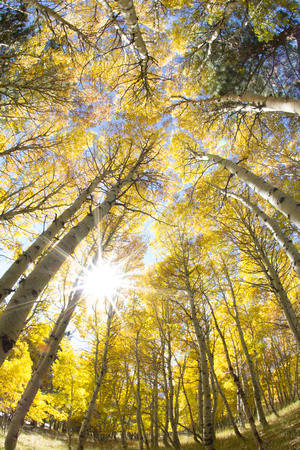
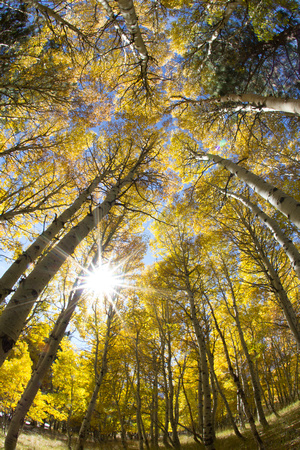
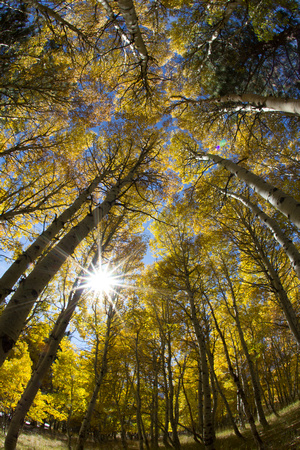
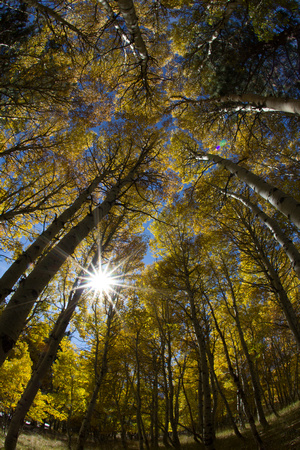
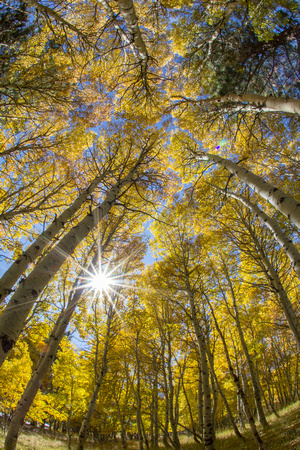
If you are out shooting and come across a scene that has a lot of contrast, I recommend taking several bracketed exposures. Memory is cheap but getting back to the same location in the same light can be expensive or near impossible. This set of aspen photos required multiple exposures to capture the full range of details, especially because I had a sun burst included in the composition.
|
Exposure for Shadows |
|
Exposure for mid-tones |
|
Exposure for highlights |
|
Exposure for sun burst |
|
Final merge |
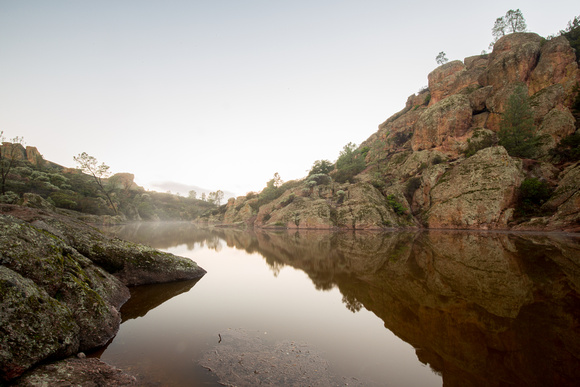
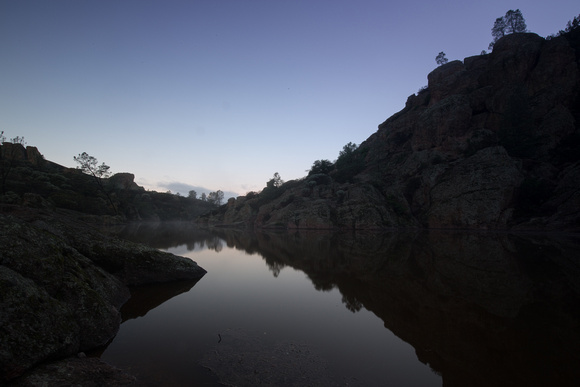
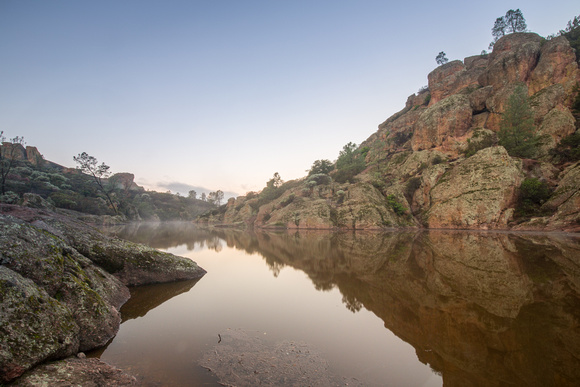
Morning light can be difficult when the foreground is still in shade. Almost every shot I took at Bear Gulch Reservoir in Pinnacle National Park was too contrasty to get in one shot. HDR to the rescue.
|
Exposure for shadows |
|
Exposure for highlights |
|
Final merge |
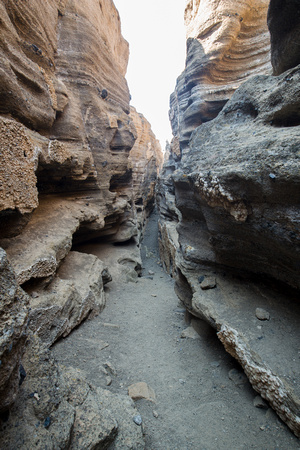
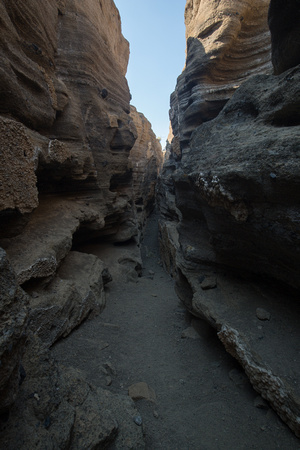
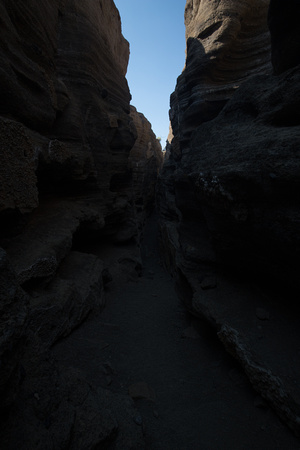
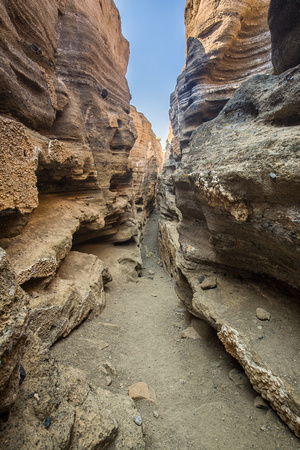
Slot canyons are extremely difficult to photograph because there is typically bright light towards the top but deep shadows towards the bottom. I got a little lost finding my way to this slot canyon in Mono County and arrived when the sun was high in the sky, making it even more challenging.
|
Exposure for shadows |
|
Exposure for mid-tones |
|
Exposure for highlights |
|
Final merge |
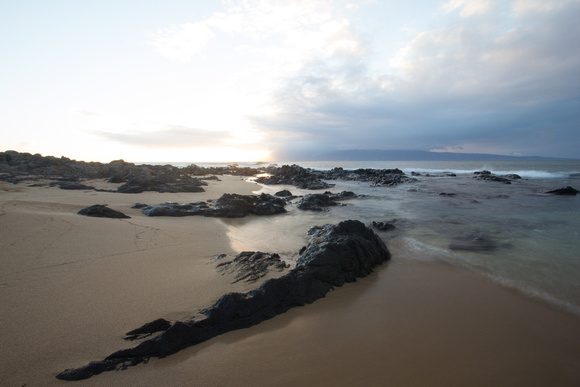
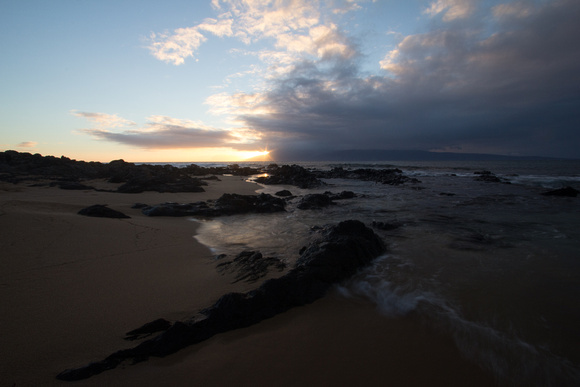
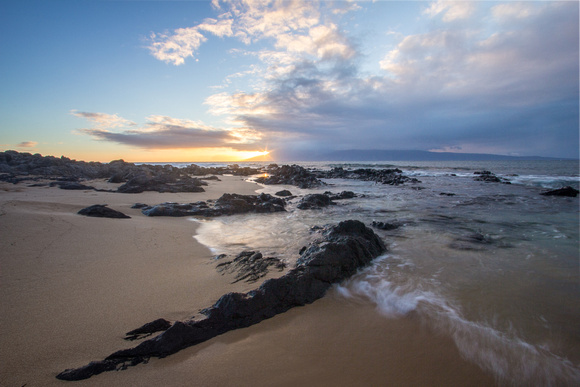
I leave you with one final shot of a typical Hawaiian sunset. My husband patiently waited while I roamed the beach looking for good compositions while the light quickly changed. There doesn't seem to be a lack of good compositions in Hawaii.
|
Exposure for shadows |
|
Exposure for highlights |
|
Final merge |
