3 filters for the field
Photo gear: 3 filters for the field
Text and photos by Heather Cline
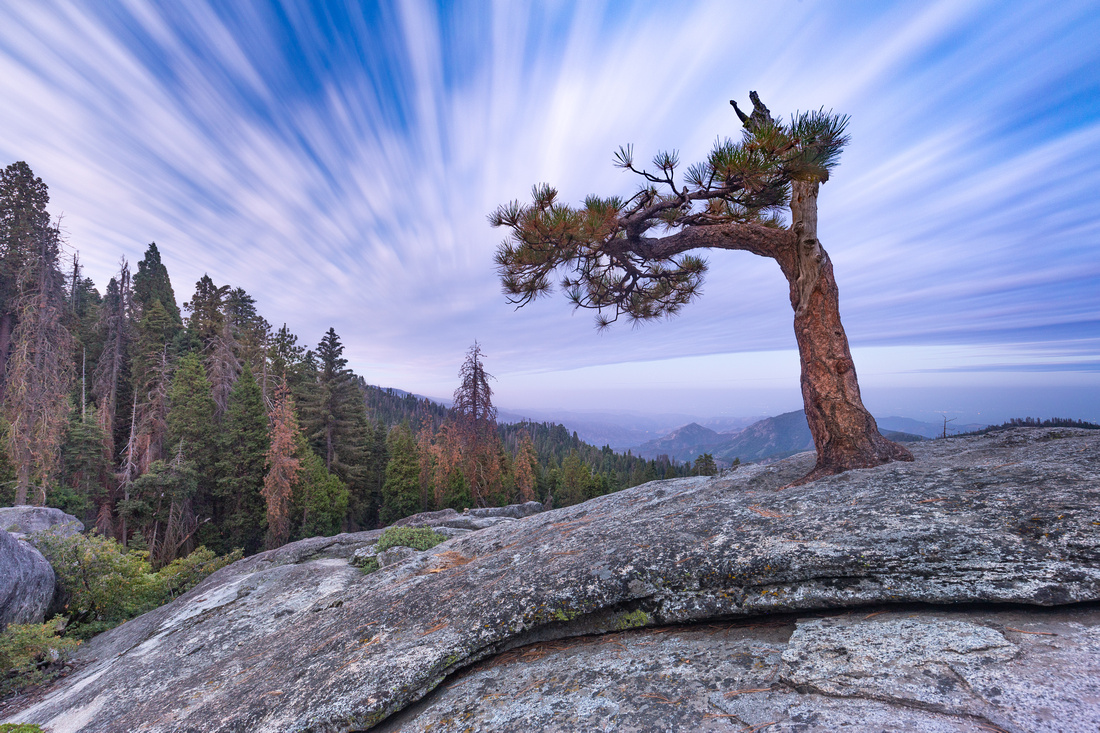 
Long exposure at Beetle Rock, Sequoia National Park |
Photography can drain your bank account as fast as any other addiction. Between camera gear, editing software, education, and travel expenses, you might start to question what accessories are really worth the investment to improve the quality of your images.
I am not a fan of collecting gear or buying the next greatest thing. Honestly, I can't afford to be that frivolous, but there are tools that I feel are critical to getting the best images possible and the filters I cover below fall into this category.
Having a wide variety of lens filters on hand while out in the field was necessary in the days of film, but digital has given us the luxury of applying some of the same effects during post processing, leaving us to divert funds to other gear if desired.
Despite the magic of digital processing, there are 3 filters I still carry with me. I'll explain why and include some examples below.
Polarizing filter
There is no post processing software substitute for a polarizing filter. A polarizing filter provides several benefits, including:
- It will help reduce unwanted glare on water, glass, and other reflective surfaces. When used on water, it improves your ability to see aquatic creatives or objects below the surface.
- It will eliminate unwanted reflections on wet surfaces, like rocks and leaves.
- It will deepen a blue sky.
- It will help reduce unwanted haze in the atmosphere.
- It helps colors appear more saturated
I use a polarizer in nearly all of my landscape images.
A circular polarizer is screwed onto the front of the lens and is designed to be rotated until you achieve the desired effect. If you wear polarizing sunglasses and tilt your head to the right or left on a sunny day, you will see the same effect that a polarizing filter offers.
You can spends hundreds of dollars on a polarizer but there are plenty of quality options for under $100. I have used B+W, Tiffen, and Hoya and have been happy with all of them. I am not one to advocate buying every cool gadget out there, but a polarizer is one tool that is worth the investment.
In addition to the benefits it provides for creating better images, it also serves as a layer of protection between the elements and your lens (which is a whole lot more expensive than the filter).
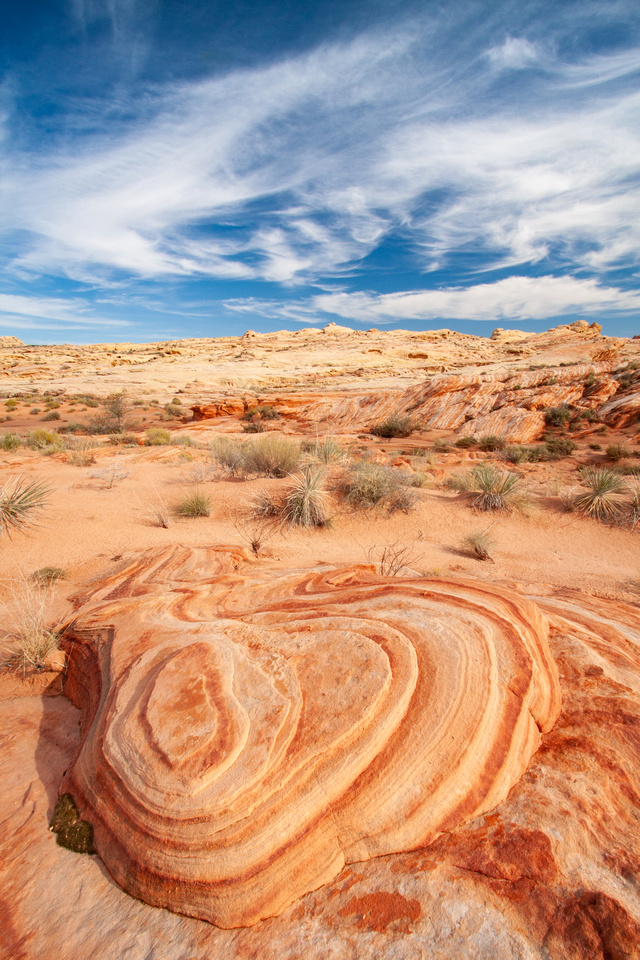
Polarizing effect on sky at Valley Of Fire State Park |
If you shoot a lot of wide angle landscapes, purchasing a wide angle polarizer is also a good investment because it's thinner, which prevents unwanted vignetting. I like to have more than one polarizer on hand so that I'm not switching back and forth so I tend to leave my wide angle polarizer on my 16-35 mm lens and use my second polarizer for other lenses.
Quick Tip: Not all lens fronts have the same diameter. You could have one lens with a 72mm front and another with a 77mm front. Instead of buying a filter for every lens, you can invest in step up rings to make all your lens fronts equal in size. This will allow you to use the same filter on any lens you own.
The cost of the filter increases as the diameter of the lens front increases. For example, a 77mm filter may cost twice as much as a 49mm filter (more glass = more money). When you are purchasing one, make sure it meets the minimum diameter you need. Most of my lenses have either 72 or 77 mm lens fronts so I purchase 77mm filters and use the step up filters to make all lens front equal in size.
Here is an example of what a circular polarizer looks like.
|
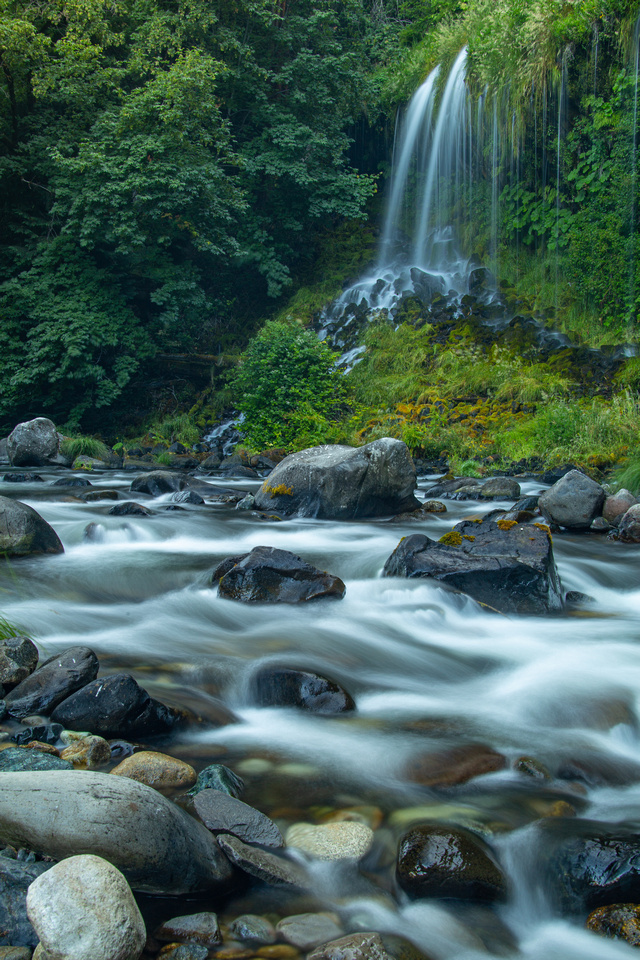
Polarizing effect on water and foliage at Moss Brae Falls |
Quick Tip: One thing to be cautious about when using a polarizing filter is to watch out for the effect it has on a blue sky, especially when shooting at wide angles. This is particularly noticeable when you are standing at a right angle to the sun. As you spin the filter, look through the viewfinder and you will notice that the sky is lighter in some areas and darker in others. I have been guilty of this more times than I care to admit - so much so - that I look at my LCD screen after each shot to make sure my sky is even all the way across the image. See the image of the Ancient Bristlecone below to see an example of this undesirable effect.
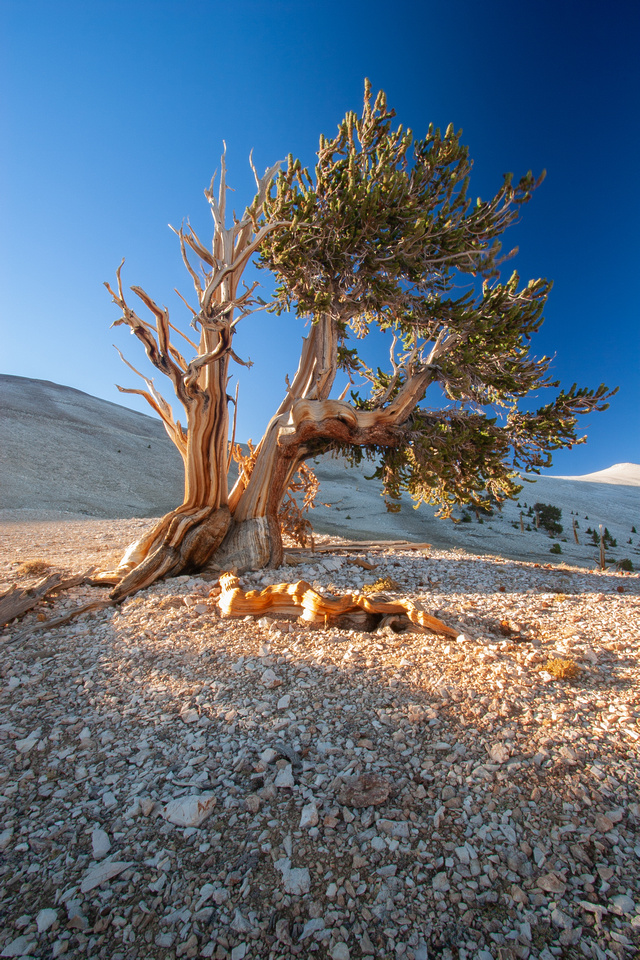
Polarizing effect used incorrectly creating an uneven blue sky |
Graduated Neutral Density filter
A graduated neutral density filter is a good tool to have when photographing landscapes with a dark foreground and bright sky. The filter transitions from clear to dark so you can balance out the exposure in challenging lighting. Digital photography has allowed us to take multiple exposures in the field and combine them into one balanced image, a technique referred to as High Dynamic Range (HDR). There is nothing wrong with that approach, but what if you don't want to spend time merging in post process? What if you want to get the image as perfect as possible in the field? Well, a graduated neutral density filter is the answer.
These rectangular shaped filters mount to the front of the lens, allowing you to move the horizon line it up or down to line it up with the transition of light to dark. Simply move the clear portion of the filter to cover the darker area of the scene and the darker portion of the filter over the lighter area of the scene.
These filters are offered with what is referred to as a soft or hard edge. This refers to the softness of the edge as it transitions from clear to dark. These also come in a variety of stops which refers to how dark the dark portion of the filter is. These can rang from 1 to 5 stops. Wondering which one is chosen most often? 2-4 stops with a soft edge. Here is an example of what these filters look like.
There are circular graduated neutral density filters as well but the transition is fixed in the center of the lens, limiting your ability to use it if you want your sky, for example, to occupy 75% of the frame. For this reason, the rectangular filters are far more useful.
These filters can be sold alone or with a bracket that mounts to the front of your lens, allowing you to move it up and down and rotate left or right as needed. I have had occasion to hand hold my graduated neutral density filter in front of my lens when I was short on time. I caution against this because it is easy to scratch the filter this way. Although it takes a little extra time, the mounting bracket will extend the life of the filter.
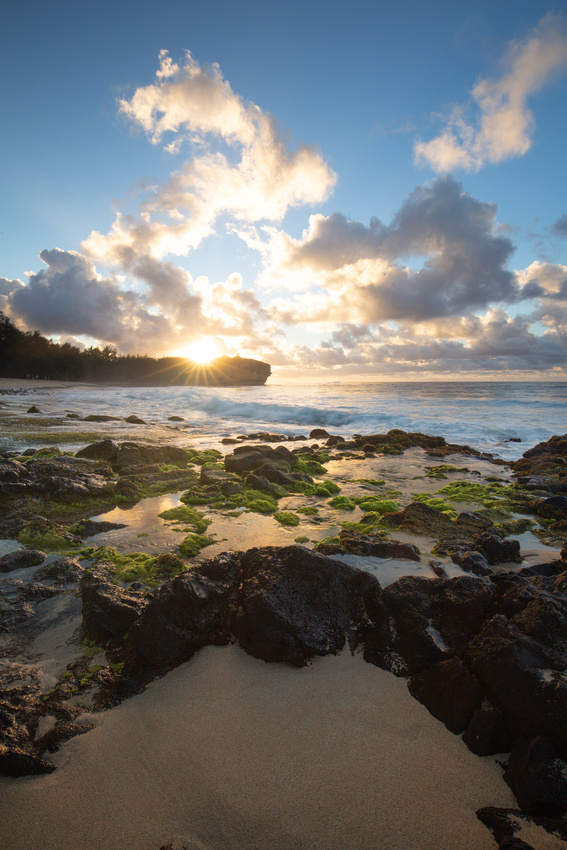
Shipwreck Beach without graduated neutral density filter |
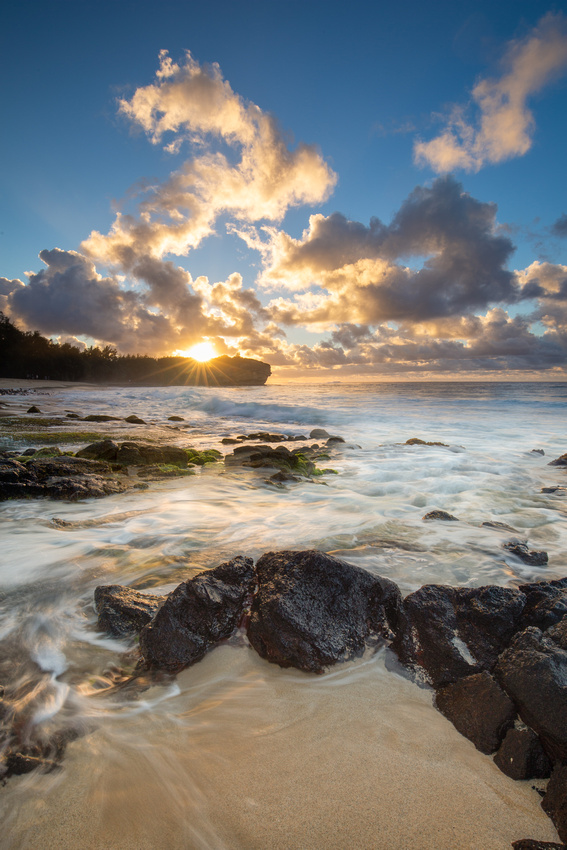 Shipwreck Beach with graduated neutral density filter
 |
Neutral Density filter
A neutral density filter offers similar capabilities as a graduated neutral density filter except that there is no transition to clear line on this filter. Instead, it is simply a darkened piece of glass that is intended to reduce the light that reaches the cameras sensor.
Why would you ever want to reduce the light coming into your camera? If you enjoy shooting landscapes and want to achieve that blurred motion effect, such as with flowing rivers, creeks, or waterfalls, it can next to impossible to slow down your shutter enough if too much light is coming in, which is most of the day. If you use a neutral density filter, you can reduce enough light to lengthen the shutter speed and gain that effect. Both of the images below were taken when the sun was high in the sky. I would not have been able to slow the water without a neutral density filter.
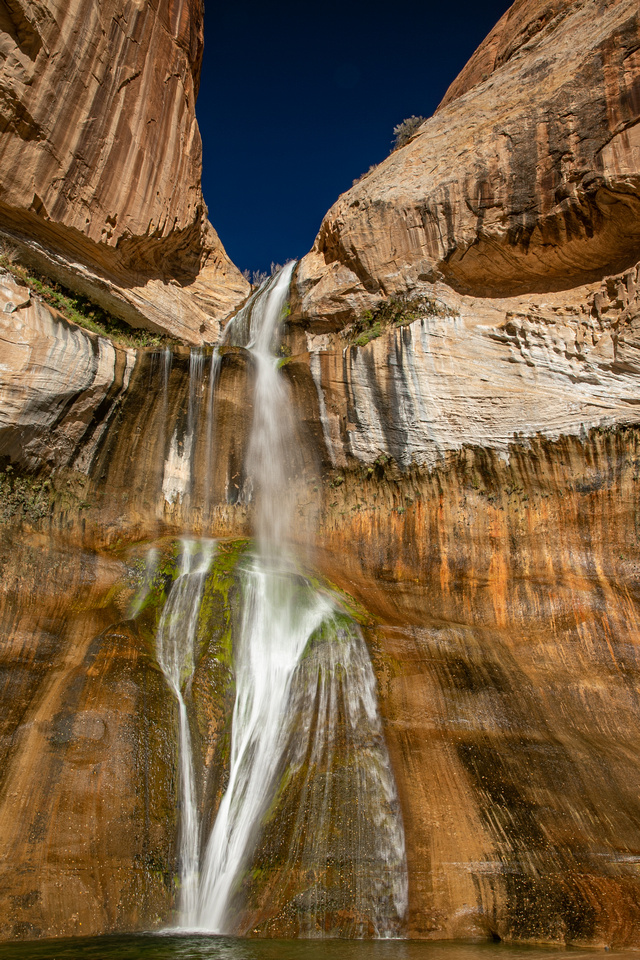
Long exposure at Calf Creek Falls, Grand Staircase Escalante National Monument |
Neutral density filters can block anywhere from 1 - 13 stops of light. The most commonly used are 3, 6, and 10 stops. Retailers often sell these filters in sets, so if you want to have a few options on hand, buying a set is not a bad idea. As with any camera accessories, the price can fluctuate depending on the manufacturer, size of lens opening, and seller.
Here is an example of what this filter looks like.
Quick Tip: A polarizing filter is also darkened and cuts out about 1.3 stops of light, so if you have one, it can be used to help cut some light out as well. These filters can also be stacked to cut out even more light but be aware that the more glass you put in front of your lens, the higher chance you have of vignetting. There is also slight degradation of the image with every extra piece of glass you place in front of the lens.
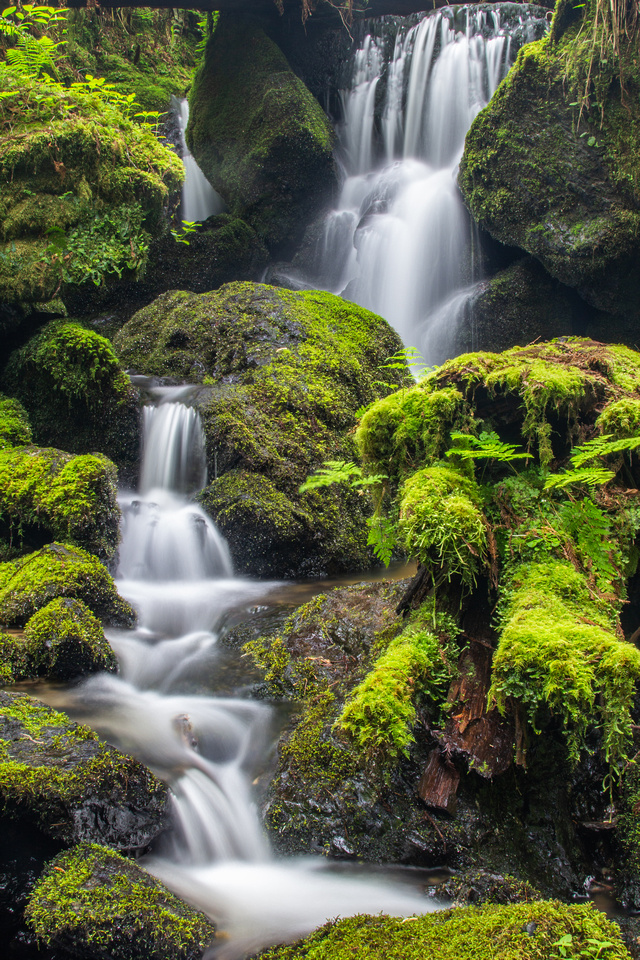
Long exposure at Trillium Falls, Redwoods National Park |
|
If you only own three filters, these are filters I recommend including in your gear bag. They are lightweight, simple to use, and help you to capture your best images in the field. I hope this article has provided some helpful tips for choosing which option is right for you.
