Light, Smoke, and Water
I’m really overdue for a photo trip but I haven’t been able to swing one recently for a variety of reasons. So – in the meantime – I thought I’d work on some photography projects that I have been wanting to try for a while.These are great shots for any photographer to try because the setup is pretty inexpensive, they can be done whenever you have free time, at home, and allow you to be as creative as you want while shooting and processing. I think these are nice experimental shots for anyone who wants to practice using manual settings too.
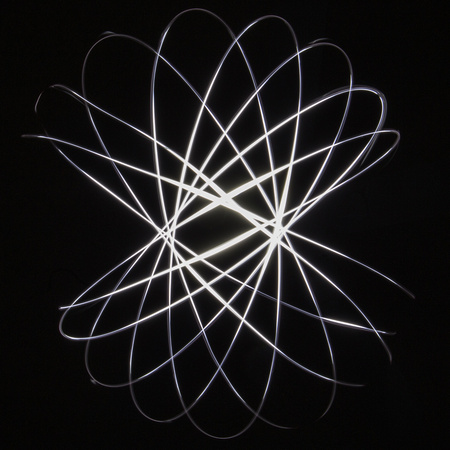
Let’s start with the Light shots.
Tools needed:
- Camera/lens. I used a 16-35 mm lens but I could have gotten away with a longer focal length.
- Cable release
- Tripod
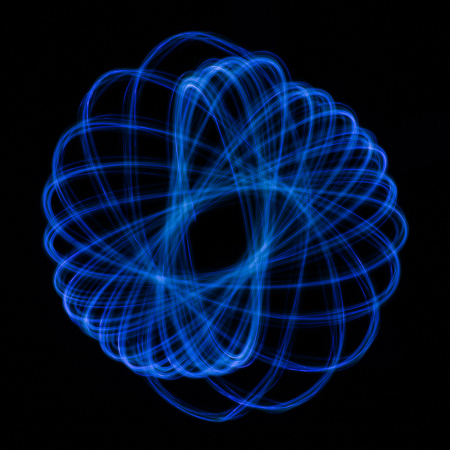
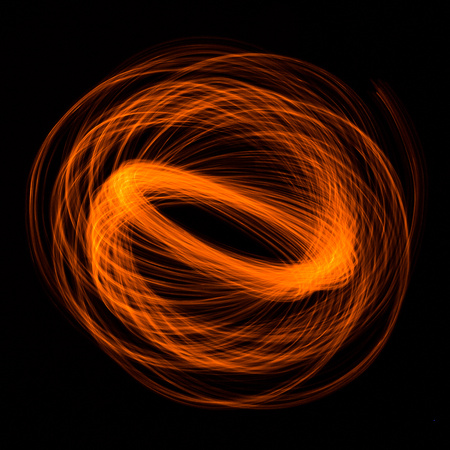
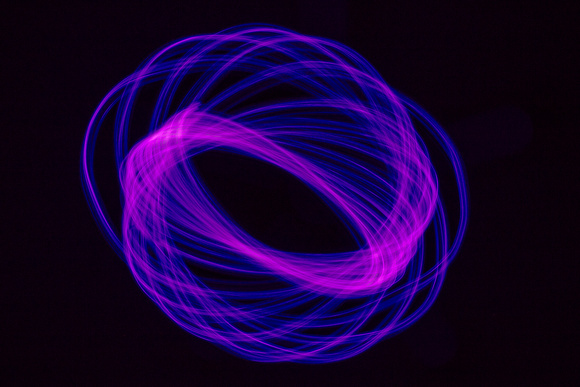
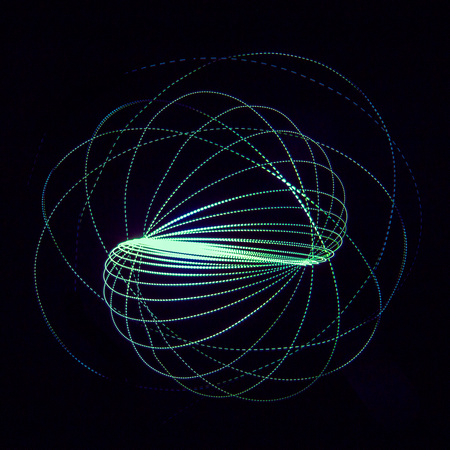
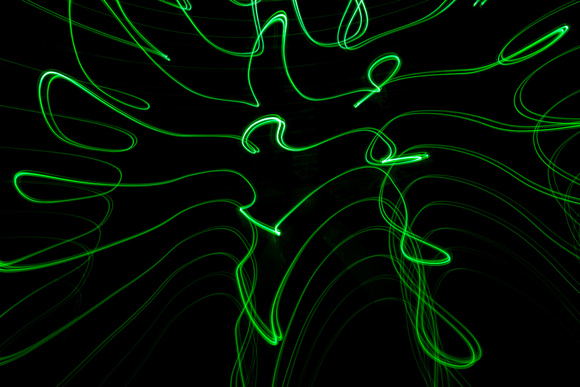
- Lights (I used a small flashlight, battery operated Christmas lights, and a tiny LED keychain light.)
- String
How I did it:
- I tied a light to string and then secured it to the ceiling.
- I set up my camera on my tripod then aimed the camera at the ceiling. I got pretty low to the ground at this point. I was basically lying on my back with the camera a few inches above my face.
- With the light source on, I focused my camera on the light source then turned the focus to manual so it wouldn’t try to refocus in the dark.
- I set my camera settings: ISO to 100, aperture to F22, and F-stop to 15 seconds. I changed F-stop several times to try different things. In the end, 30 seconds seemed to work the best.
- I plugged in my cable release so I could trigger each shot without touching the camera.
- I turned off the lights so it was completely dark, except for that hanging light source.
- I gently swung the light in a circular motion. You can experiment with speed and angles as you go.
- I clicked the shutter using my cable release.
- I waited for the exposure to finish then checked the results.
- Once you have done the basic set up and successfully captured a shot, you can use your imagination to get different results. I didn’t go crazy with this one, but I imagine you could set up multiple lights on the ceiling to get multiple patterns in one shot. You can always combine them in post process too. After I got bored swinging different lights around, I grabbed my homemade light wand and tried a few different things. This wand is basically a set of battery operated Christmas lights secured to a wooden dowel. Cheap but effective!
|
Flashlight |
Battery operated Christmas lights |
|
Battery operated Christmas lights |
Battery operated Christmas lights |
|
LED light |
Light wand |

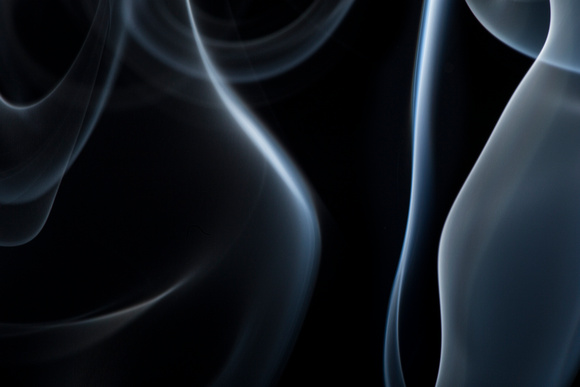
Smoke setup
Tools needed:
- Camera
- Macro lens
- Cable release (not required but encouraged)
- Off camera flash and cord
- Extra flash batteries
- Reflector
- Black backdrop
- Incense
- Small flashlight
- Stuff to change the smoke shape (like a metal spoon)
- Space that is well ventilated and can be easily aired out between shots
How I did it:
- I setup my backdrop (a piece of black fabric I had laying around).
- I placed a table about 3 feet away from the backdrop.
- I set up my flash unit to aim at the smoke and away from the backdrop.
- I set up my reflector opposite the flash (to reflect more light back at the smoke).
- I set up my incense.
- I set up a small flashlight aimed at where I thought the smoke would rise.
- I set up my camera and attached the flash cord to the hot shoe.
- I set my camera settings: ISO to 250, aperture to F22, and F-stop to 1/180th of a second.
- I plugged in my cable release so I could trigger each shot without touching the camera.
- I turned off the lights so the room was as dim as possible. You can do these during the day or at night. I block out most of the light from eth window so it would be relatively dark in the space I was working.
- I lit the incense.
- I practiced focusing and shooting, refocusing and reshooting until the smoke build up was enough to warrant an “air out”. I did this many times until I thought I had enough decent shots.
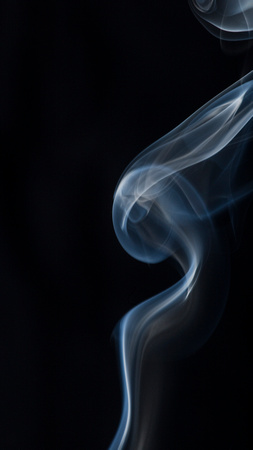
- I took 453 shots during this exercise one and kept 115 of them. Smoke shots turned out to be very challenging because the smoke is constantly moving towards and away from the camera, making focusing incredibly difficult. That is where that dandy little flashlight came in handy because I was able to light up the section of smoke that I was aimed at. Smoke has a mind of its own too. It’s going to go whatever direction it wants and create whatever shapes it wants. You just have to be patient and shoot, shoot, shoot. Smoke is also well, smoky. Even though I kept the door shut and aired out between shots, that incense smell permeated that section of my house. I’m still trying to air it out. Next time: garage.
|
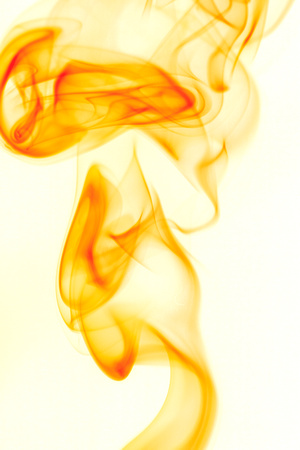
Standard smoke trail |
I think this looks like a tornado |
|
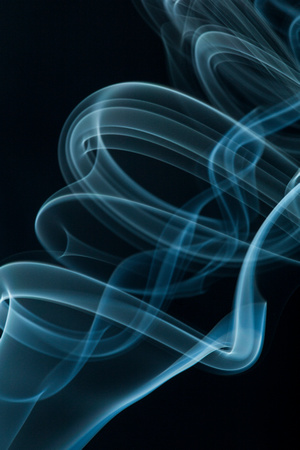
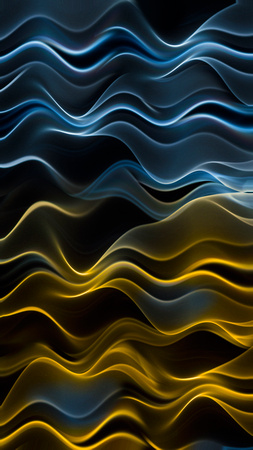
Use the wave filter in Photoshop to create this pattern |
I think this looks like a waterfall |
|
Used the wave filter and dual tones |
I think this looks like sheer fabric |
|
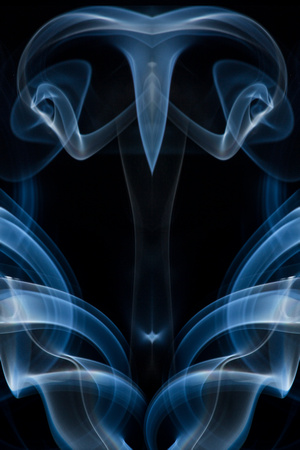
This reminds me of Aliens or The Abyss |
I think this looks like a monkey looking down at a leaf |
|
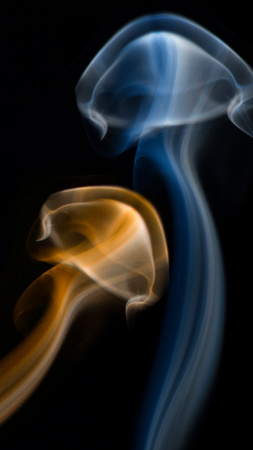
I see jelly fish |
Use the invert function in Photoshop to create this |
|
Three smoke trails combined in Photoshop |
|


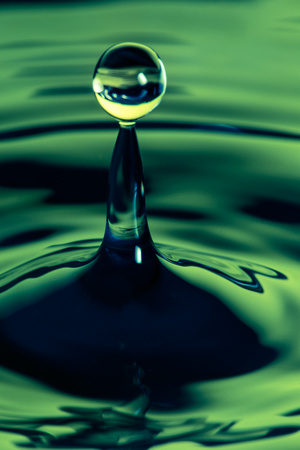
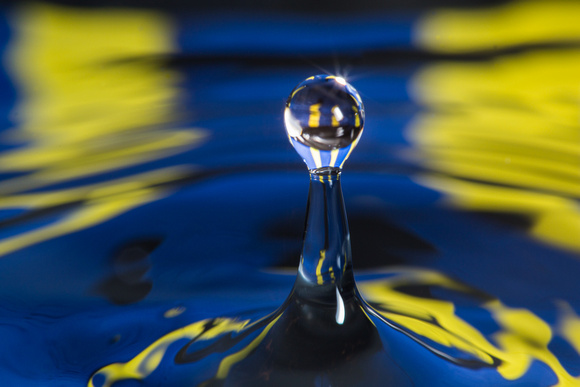
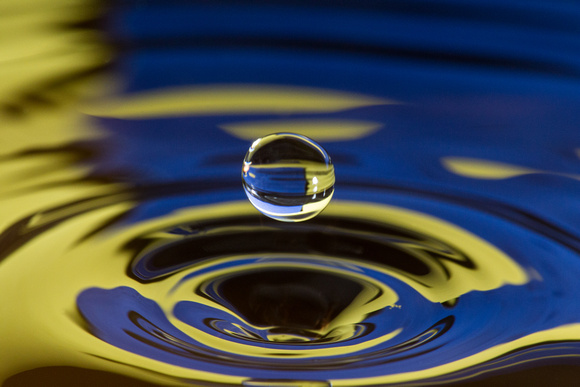
Water setup
Tools needed:
- Camera
- Macro lens
- Cable release
- Off camera flash and cord
- Extra flash batteries
- Reflector
- Backdrop (different colors produce different results)
- Water holder/dropper. I used a plastic cup with a needle hole poked in the bottom.
- Water container to hold the dripping water, and filled with water to create reflections
- A structure to hold the water dropper above the water container. I created one out of a couple of light stands and some old tent poles
- A space you don’t mind getting wet, or splash protection.
How I did it:
- I set up a table against a wall, then covered the table and surrounding space with large black garbage bags, then taped them down.
- I setup my backdrop on top of the table, leaning on the wall (11x14 poster board).
- I set up my flash unit to aim at the backdrop.
- I set up my water container then carefully filled it near the top with water.
- I secured my water container to the structure, but did not add water to it yet.
- I set up my camera and attached the flash cord to the hot shoe.
- I set my camera settings: ISO to 250, aperture to F22, and F-stop to 1/5th of a second.
- I plugged in my cable release so I could trigger each shot without touching the camera.
- I added water to the dropper (cup)
- I took a long screw and placed it upside down in the water container so the dropping water would hit it. I manually focused on the screw, then turned my focus settings to manual and removed the screw. This ensured my focus was good as long as I didn’t move anything.
- I practiced shooting over and over and over again.
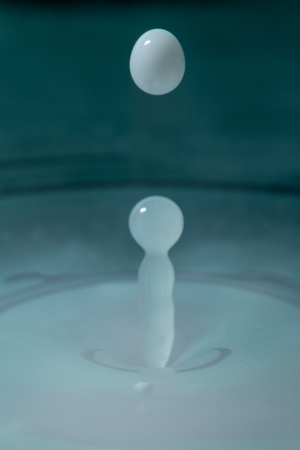
- I shot for several hours and took 825 photos. It was incredibly difficult to anticipate when that water drop was going to hit just right but after a while I learned that I could count the timing of the drops and figure out when the press the release based on when it left the cup. After I figured this out, I got more shots of drops and less of a flat pool of water. This is a great exercise for practicing patience and perseverance. There are kits that will drop the drops and trigger the shutter for you based on preset timings. These will greatly increase your odds of getting more good shots, but they also cost hundreds of dollars. I don’t anticipate doing this type of photography enough to warrant that expense and everything I used to do this was sitting around my house so it cost my favorite amount: nothing. After I shot for several hours, I decided to add milk to the water container. You obviously can’t take many shots once you add a another liquid without it changing the water “pool” but it was pretty cool and could be done with food coloring as well.
|
I added milk to the water dropper to change the drops |
This looks like a ghost to me |
|
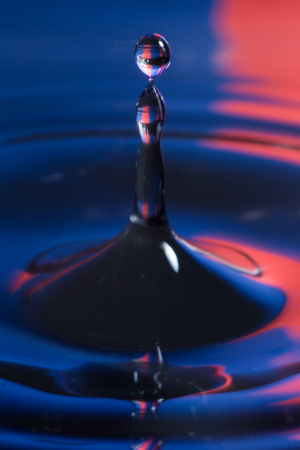
Blue and red background |
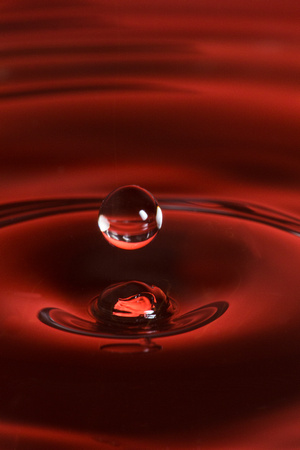
Red background. I almost didn't try it and this ended up being my favorite one. |
|
Splash |
Green background, enhanced in Photoshop |
|
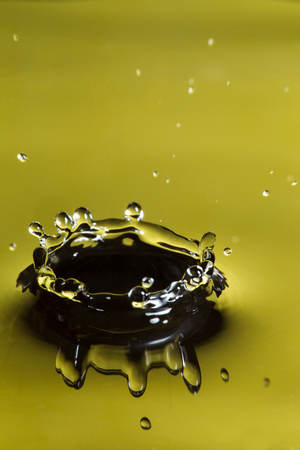
Yellow and blue background - complimentary colors! |
Yellow and blue background - complimentary colors! |