5 unique wildflower photography techniques
Wildflower Photography: 5 Tips for Capturing Unique Wildflower Images
Text and photos by Heather Cline

Spring is one of my favorite seasons because of how the wildflowers transform the landscape. Every year, I look forward to going out in the field to photograph spring's color to my hearts content. But - sometimes I feel like, "I've shot this image before". How many different ways can you photograph a wildflower after all? I decided to challenge myself this spring and come up with some techniques to create images that are unique and interesting.
I'm sharing the results of my experiments here. Please leave me a comment if you tried any of these - or have some fun ideas of your own!
#1: Shoot on a Black Background
This Prairie Sunflower was photographed in the middle of a wildflower field, but you would never know it. It looks like this was shot in a controlled setting, like a photography studio with lights.
How I did this:
- I brought a couple foam core boards (11x14 each) into the field. One was white/black on each side. The other was white/gray on each side. I experimented with all 3 colors and liked the black background the best.
- I shot this just before sunrise and I used a fill flash with a diffuser to create even, soft light on the flower. If I were to shoot this again after the sun was up, I would have used a light diffuser to even out any harsh light from the sun.
- I used clamps to hold the background in place and used the other foam core board to block the wind. Wind is not the friend of a wildflower photographer!
- This could be shot handheld but I wanted to increase my depth of field (aperture) so I had to slow down my shutter speed, so I used a tripod to keep the camera still during the exposure.
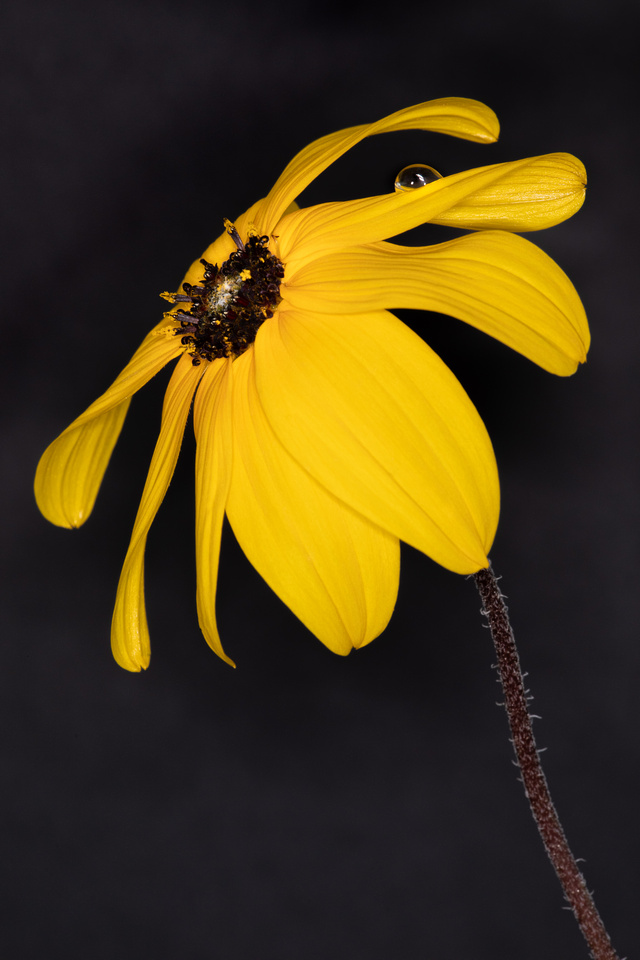
Prairie Sunflower on black background - 180mm | ISO 400 | f16 | 1/40 second |
#2: Shoot From Behind or Below
This desert Primrose was photographed a few feet from the Prairie Sunflower above. The sun hadn't quite made it above the horizon but it was light enough to illuminate the face of the flower and filter through to the back. I had to get very low to achieve this viewpoint - like 'face in dirt' low. I shot with a very short depth of field to blur out the purple sand verbena in the background and soften the edges of the primrose petals.
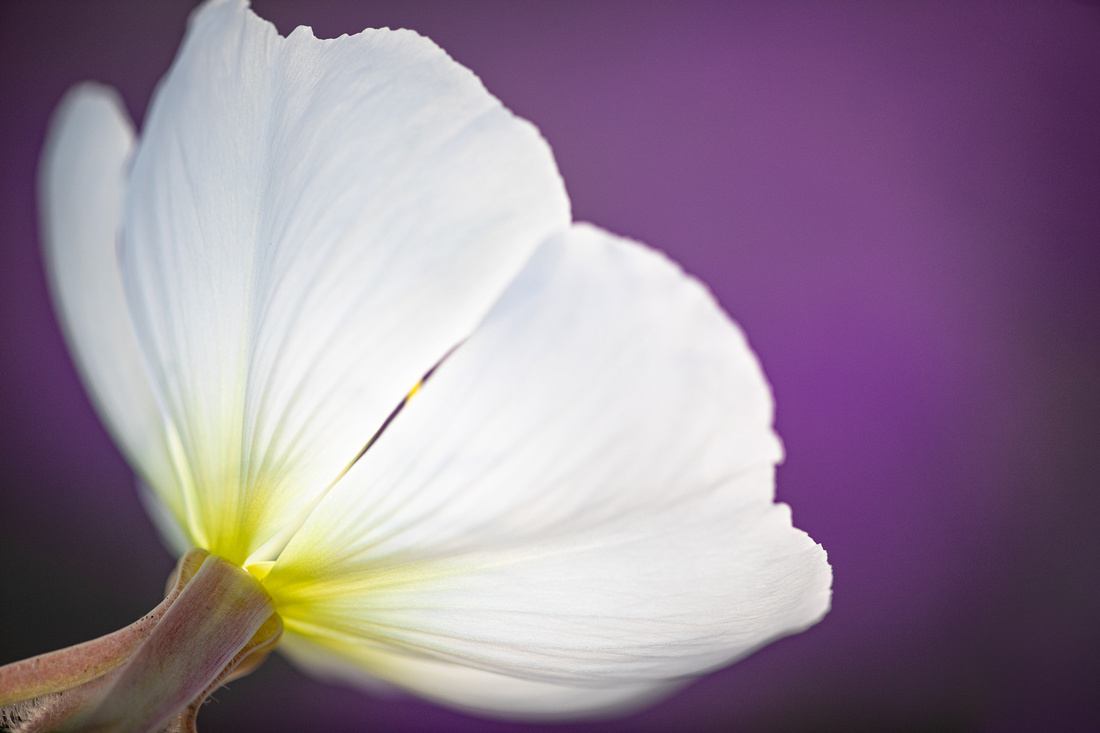
Desert Primrose - 180mm | ISO 250 | f3.5 | 1/800 second |
#3: Use A Prop
This one is pretty open to interpretation - and I do have some ideas for other props this spring - but I really wanted to try out the crystal ball effect for this post. I have a lot of learning to do when it comes to photographing with this fun little prop, but this wasn't a bad start.
How I did this:
- I bought a crystal ball on Amazon for $20
- I set it in front of a landscape I wanted to capture. In this case, it was set on the ground and I gently piled up sand around the base.
- I shot the image as I would any other landscape (except that my face was in the dirt yet again)
- During post process, I flipped the image inside the ball 'right side up' because the ball renders the view upside down and I found that unsettling.
- Note: in hindsight, I could have (and should have) shot this at a smaller aperture for deeper depth of field - but this is why I experiment - to learn and get better. Stay tuned for more of these!
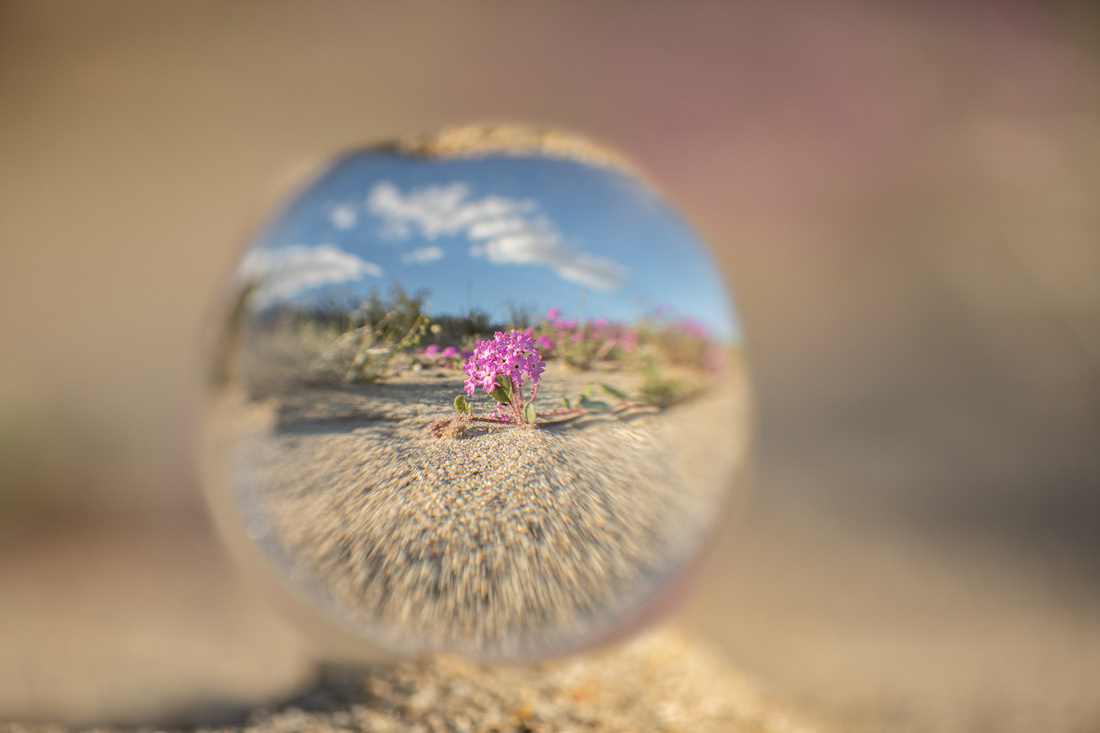
Sand Verbena landscape - 180mm | ISO 250 | f3.5 | 1/2000 second |
#4: Play With Motion
This may have been my favorite experiment so far. I have been doing motion blur photography for a long time but his time, I really spent some time experimenting with different focal lengths, apertures, shutter speeds, directional movement, and flower combinations. I tried hand holding and using my tripod. I tried zooming, spinning, panning - and some combination of all three to see what would unfold. This is a technique that requires you shoot over and over and over again. I shot hundreds of images and deleted most of them, but when you get a good one - it's awesome! Plus, it's highly unlikely that anyone will capture the same thing. Its like your own little wildflower snowflake.
Some quick tips:
- There are no strict rules on shutter speed, but you want to use a shutter speed at or longer than 1/20 second to allow for enough movement so that it looks intentional.
- To get longer shutter speeds, set the ISO low (like 100) and aperture to the smallest your lens will allow, especially if it is a bright sunny day. You can add a neutral density or polarizing filter to your lens to reduce incoming light - thus allowing you to slow down your shutter speed as well.
- In terms of movement, a little goes a long way. If you move the lens too much, it just becomes an indiscernible blur.
- Try starting the panning movement before you press the shutter and keep going after the shutter closes. This will create a smoother motion blur.
- Get comfortable and shoot a lot of images! It's a good idea to check your LCD to see how the images are looking with different types of movements and shutter speeds but don't worry if you have created 50 images that look a lot alike. The key to this is experimentation with the knowledge that you will be deleting many images you shot.
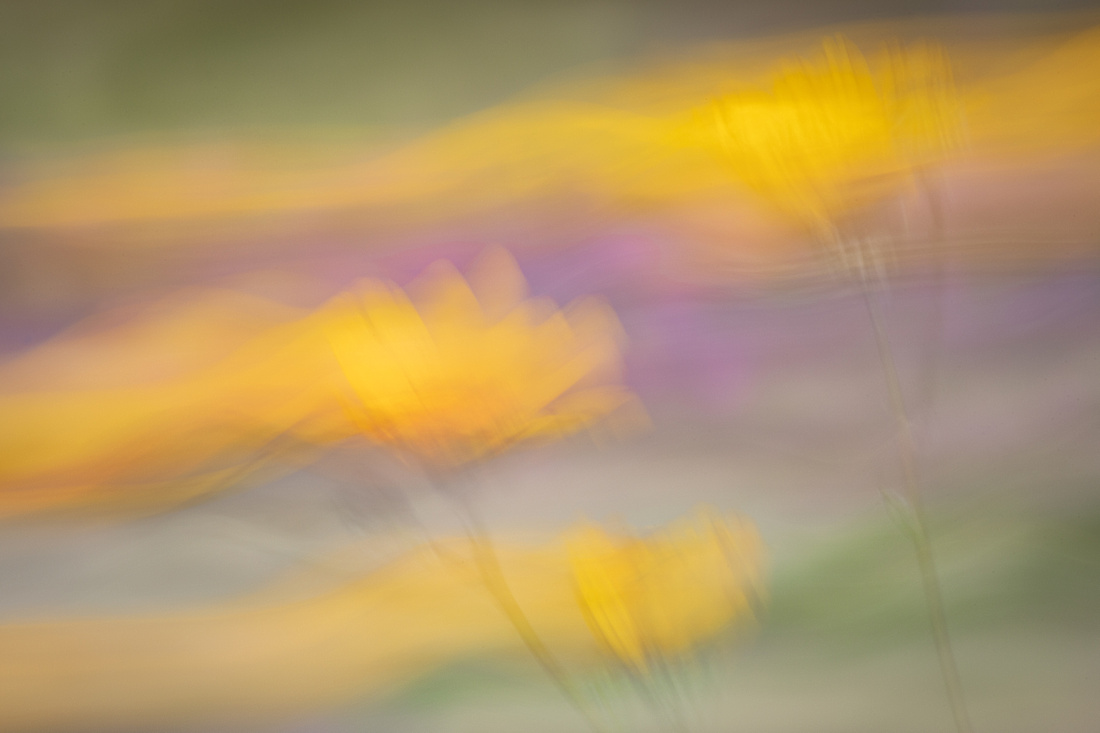
Wildflower motion blur - 400mm | ISO 50 | f40 | 1/6 second |
#5: Just Add Water
Using a spray bottle or water dropper to add droplets can transform wildflower images. You can create the look of morning dew or a recent rain with a simple and inexpensive spray bottle. A water dropper makes it easier to apply single drops to flowers. You can pick up a small spray bottle in the travel accessories section of your local store. Water droppers are often available in the first aid section as well. Because of their compact size, they can be tucked into your camera bag pretty easily. They barely take up any space and are a lot of fun to experiment with.
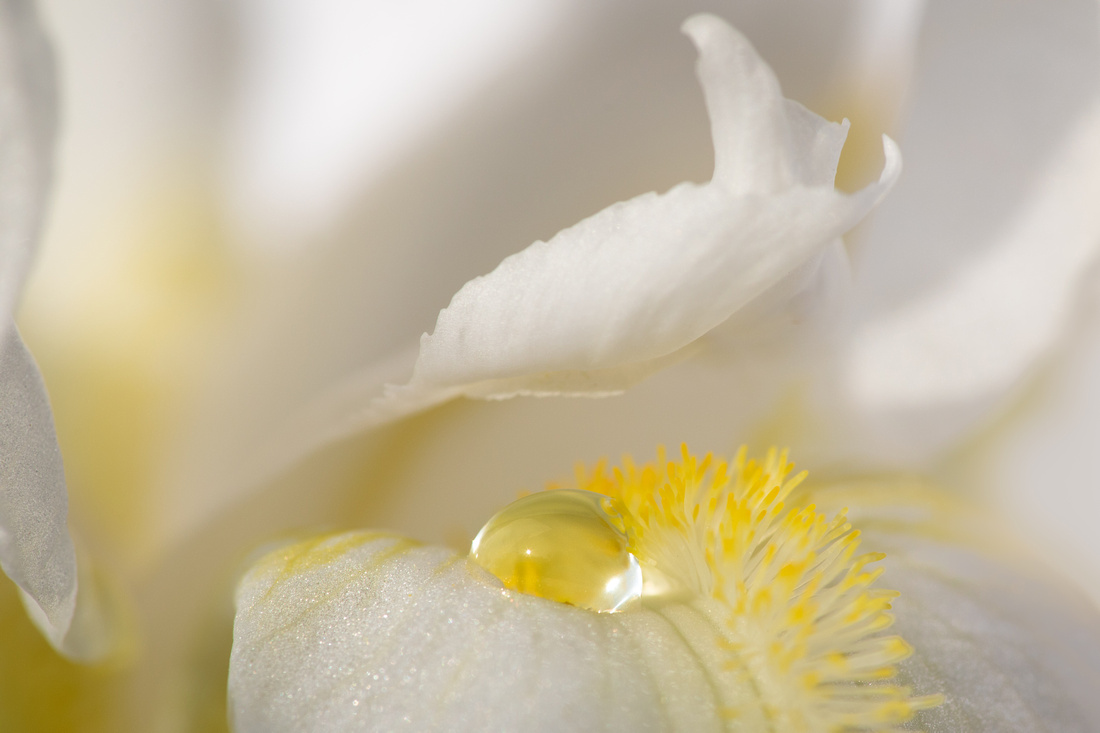
Wild Iris - 180mm | ISO 320 | f8 | 1/500 second |
So there you have it - 5 ideas to create some unique wildflower images this season. I didn't mention it in the post, but you can do a lot of these things with your smartphone, so even if you find yourself out in those flower fields without your camera, there's no reason you can't create some magic this season! I'll keep experimenting and share as I learn more.
