Natures panoramas
What is a panorama?
Panoramas are composite images of two or more photos that have been stitched together.
They can be short and wide or narrow and tall.
There is no set panorama dimensions that must be followed, but rather what you as the photographer determines is right for the subject.

THE VALUE OF PANORAMIC IMAGES
While cameras are great tools for relaying an artistic vision, they are constrained to producing a standard 35mm image.
By taking multiple images of a single scene, you can create something that is unique, offering the viewer something they haven't seen before.
This not only sets you apart from other photographers, it attracts more attention.
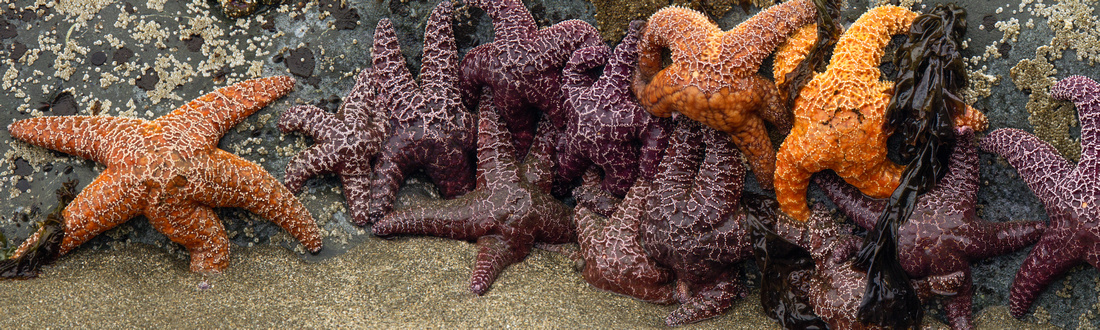
Panoramas are a great way to capture sweeping landscapes
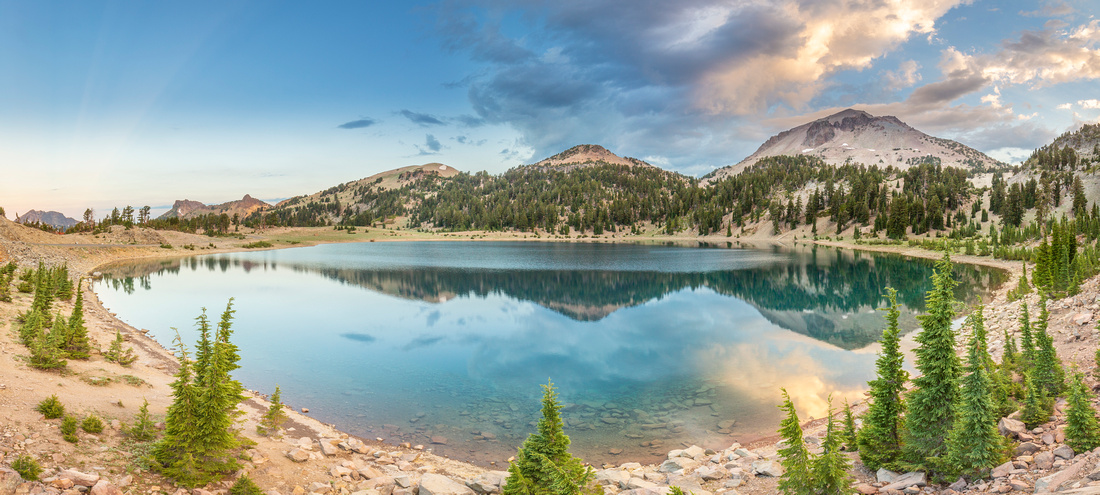 Lake Helen, Lassen National Park
PANORAMA CANDIDATES
How can you identify a good panoramic opportunity?
- The best panoramas are those that have interest at every layer, the foreground, middle ground, and background.
- Scenes that have a single subject and whose broad surroundings serve to enhance that subject also make for great panoramas.
- If all the elements you want to include in the photo don’t fit into a standard frame, you may have a good panorama candidate.
EQUIPMENT
- Any camera that allows for manual settings, including: white balance, aperture, shutter speed and focus.
- A standard 50mm prime lens is considered the perfect focal length for panoramas. Remember, this is a guideline, not a requirement.
- You can try different focal lengths for different subjects and determine what is best for what you are trying to convey, but it is important to use a lens with minimal distortion and good edge sharpness since this is what will be overlapping each image in the series.
- A ball head on a tripod that can be locked and rotated.
- A bubble level, either built into the tripod or as an add on.
- Remote release if you are taking longer exposures.
Note: this is not the time to use a polarizing filter as it will darken the sky based on your position to the sun, which is not equal as you pan to capture multiple shots.
SETTINGS
This is a good time to shoot on manual because you want to ensure the exposures remain consistent across all captured images.
If there is a wide range of light throughout the image, it could be tough to find one exposure for the entire image. You can meter to find a good middle exposure and use that for the overall image, or you can shoot the panorama two or more times at different exposures, creating a High Dynamic Range Panorama. That scenario gets a little more complicated, so I'll save the details for another post. Either way, I recommend shooting in RAW so you can pull out shadows and control highlights in post process.
- Aperture: F8 or smaller is ideal for sharpness.
- Shutter speed: depends on what you are shooting, but if your subject has motion blur, you might want to stick with a higher shutter speed to avoid discrepancies where images overlap in stitching.
- White balance: whatever makes sense for the scene - just not Auto White Balance - or it might change from shot to shot, which will look funky when you go to stitch them together.
- Focus: This is a good time to leave your lens on manual focus so it doesn't refocus on each shot, which would create the same issues as Auto White Balance.
SHOOTING
- Select the scene, factoring in foreground elements.
- Ensure the tripod is level using the level.
- Set up the camera and adjust the settings.
- Note: You can shoot in horizontal or vertical but vertical will allow you to capture more vertical space per shot.
- Overlap each image by 25-50%. This will improve the end results when stitching together.
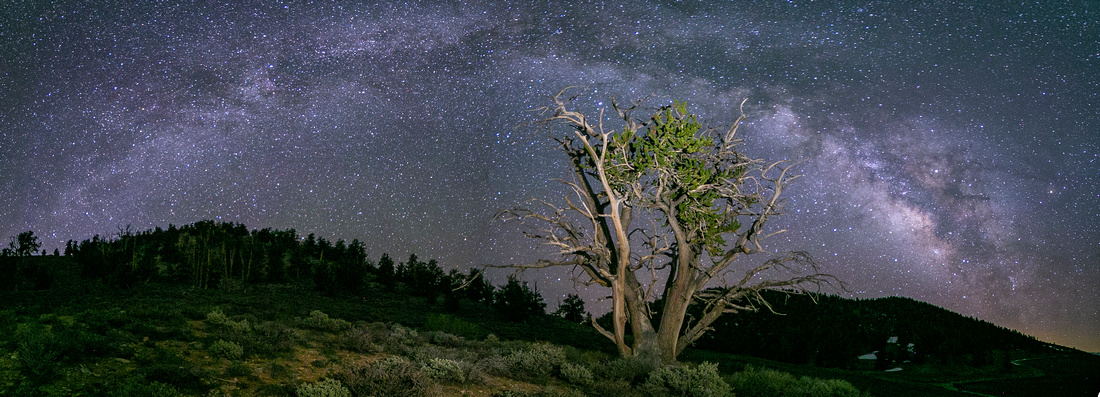 Ancient Bristlecone and Milky Way
POST PROCESSING
There are two methods I use for stitching the final image: Lightroom or Photoshop. I find both fairly easy to use.
Let's start with Photoshop:
- With Photoshop open, go to the top nav and select File > Automate > Photomerge
- This will present a pop up box.
- Leave the Layout set at Auto and all other defaults set as is.
- Click Browse to select the source files that will be stitched together.
- Click OK
- The images will open as layers and blend one seamless composition
- From here, you can crop and edit as desired.
From Lightroom:
- With the photos open in either Library or Develop mode, select all files to be stitched.
- Right click, then select Photo Merge > Panorama
- This will present a pop-up box where a panorama preview is being built.
- Once built, you can choose Spherical, Cylindrical, or Perspective. It defaults to perspective (this is often my favorite choice)
- You can select Auto Crop to allow Lightroom to perform the crop for you, or manually crop yourself. You can also adjust boundary warp to reduce the amount of cropping needed.
- Click Merge.
- Lightroom will build a final composite and store it in your catalog next to the images used to create the panoramic
I tend to use Lightroom for 90% of my editing, so I use this option more often and it is quite handy.
One tip I've learned along the way: I label every photo I take. If the photo is part of a panoramic, when I am shooting, I will grossly overexpose the image just before and just after the series of panoramic images. If I am labeling hundreds of images from a trip, this alerts me that I have a series for a panorama. Then, as I am labeling, I include the word "pano" within the title. This makes it easier to locate the images later for quick stitching.
That's it! I hope this post has helped you understand more about what panoramas are; when, why, and how to capture them as well as post processing tips. If you would like to see more of my panoramas, please visit my gallery at: Panoramic.
