Shooting handheld for landscape photography
Shooting Handheld for Landscape Photos
Text and photos by Heather Cline
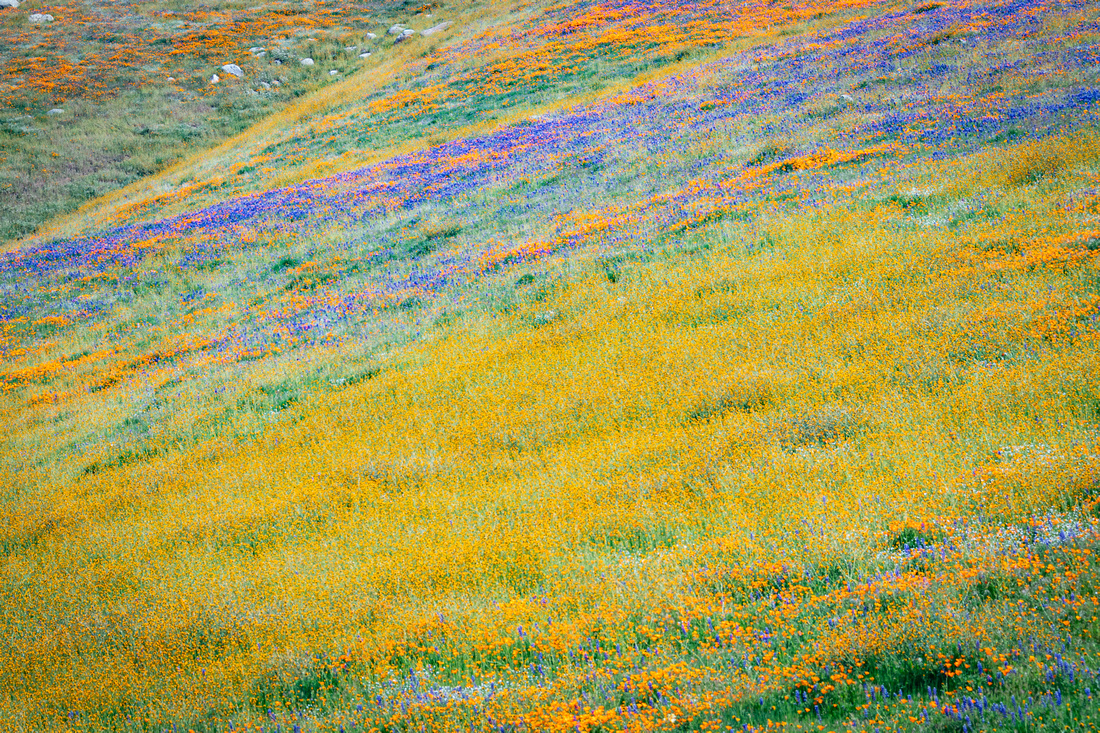 Wildflowers, Arvin California Wildflowers, Arvin California
Spring wildflowers, Arvin California |
One of the first pieces of advice photographers receive when beginning landscape photography is to use a tripod. The primary benefit of using a tripod is getting tack sharp images with good depth of field in almost any light. But, what if you just don't want to lug around another piece of equipment, or the venue in which you are shooting prevents you from using a tripod? The good news is, it is possible to get good handheld landscape images. Your results will be improved by using a few simple tips.
Aperture
The scene you are photographing will dictate the aperture you need to ensure sharp focus throughout the image. If the elements within your frame range from very close to very far (like in the image below) you will need to choose a smaller aperture to ensure everything is in focus, such as f16. However, if the elements are shallow from front to back, you can get away with a wider aperture, such as f8. The smaller the aperture, the longer the shutter speed or higher the ISO. There are trade-offs here. With a longer shutter speed, you will risk camera shake. With a higher ISO, you will have more noise (aka: grain) in your image. Given the technology available to reduce noise in post production, I always opt for a higher ISO over longer shutter speed.
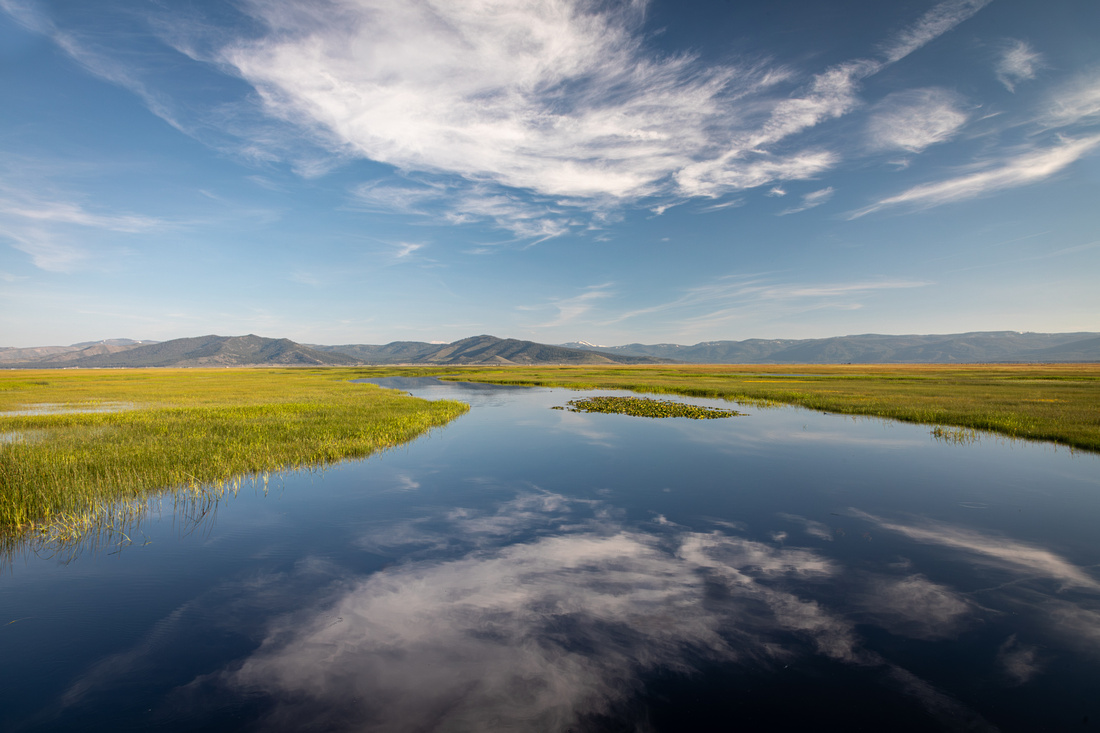 Sierra Valley Sierra Valley
Sierra Valley reflections |
Shutter Speed
Using a fast shutter speed will minimize the impact of camera shake. If you aren't sure what minimum speed to use, a good rule of thumb is to use a shutter speed twice the focal length of the lens you are shooting with. For example, if your lens is 70mm, make sure your shutter speed is at least 1/140 second.
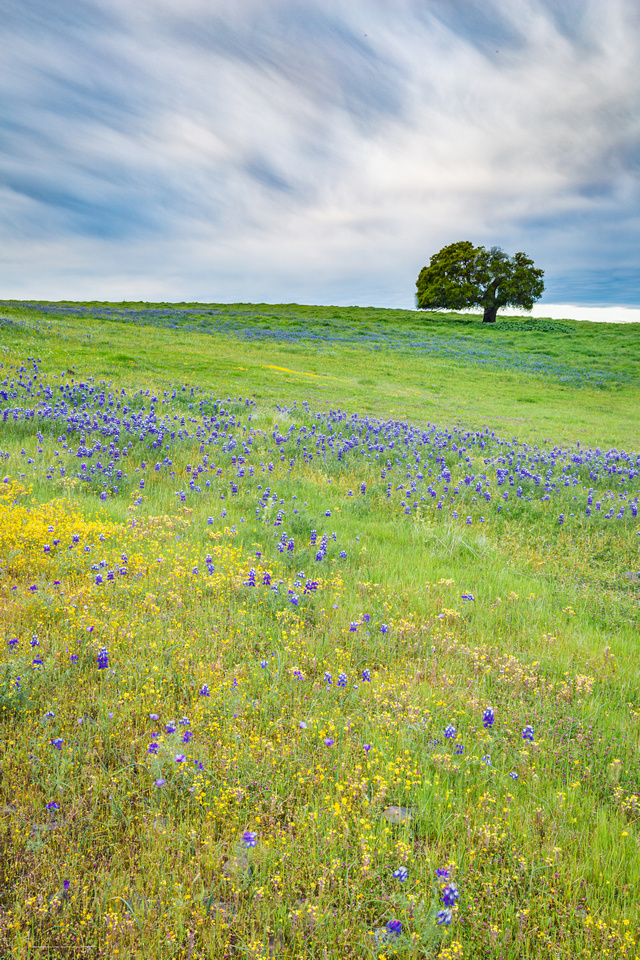 Table Mountain Table Mountain
Wildflowers on a rainy day, Table Mountain |
ISO
I remember the days of being afraid to shoot with ISO 400 film because of the graininess of the negative and print. This same constraint carried over to digital but as camera technology has improved, we can get away with higher and higher ISO's. For the image below, I was in a wildlife refuge that required you stay in your vehicle so I couldn't set up my tripod. Instead, I pushed the ISO to 1000 to keep the shutter speed fast enough to prevent camera shake.
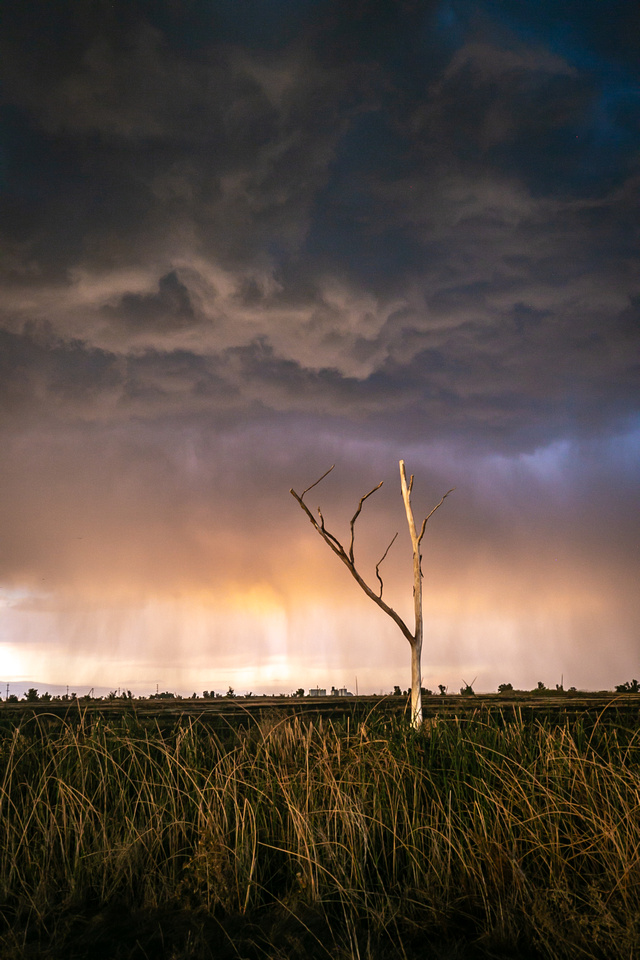 Sacramento National Wildlife Refuge Sacramento National Wildlife Refuge
Thunderstorm, Sacramento National Wildlife Refuge |
Image stabilization
Image stabilization is a common feature on cameras and lenses today. If you plan to handhold, turn it on. It is another great insurance policy to help you get sharp landscape images.
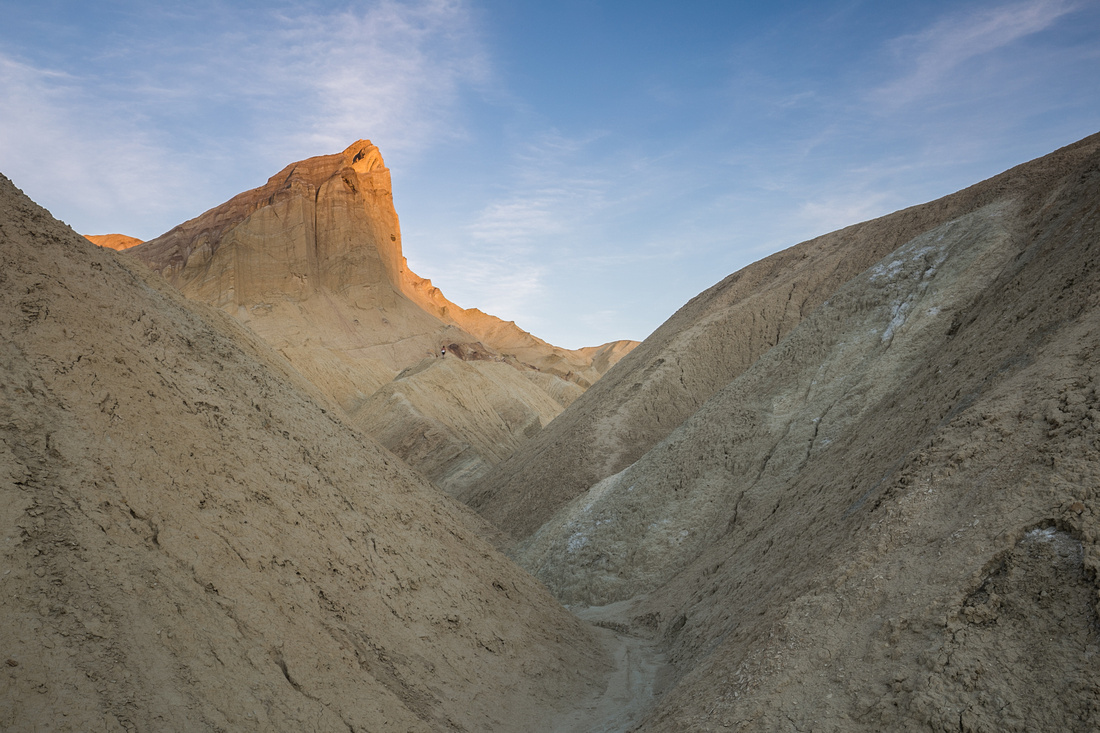 Golden Canyon, Death Valley National Park Golden Canyon, Death Valley National Park
Golden Canyon, Death Valley National Park |
Continuous shooting
Your camera has a setting called continuous shooting (aka: burst mode, sports mode) that will take multiple images as long as the shutter is depressed. This method isn't a guarantee, but you may find that you get a tack sharp image in one or more of the images captured using this approach.
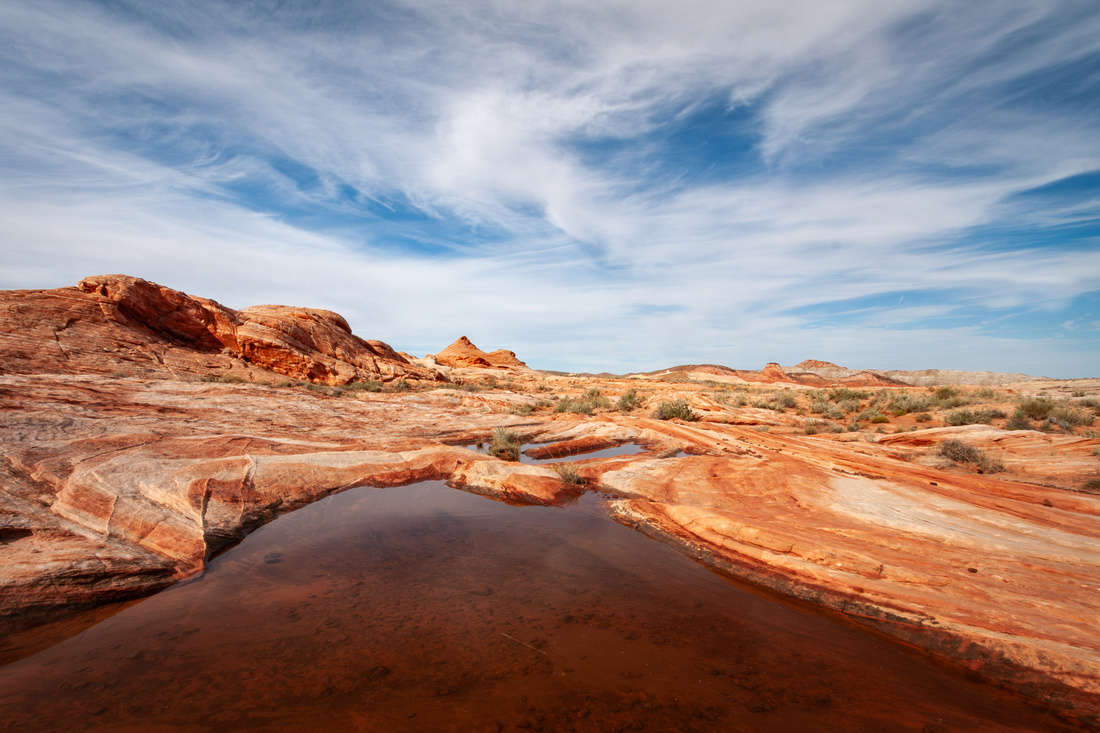 Valley of Fire State Park Valley of Fire State Park
Valley of Fire State Park |
Leverage Nearby Objects
Just because you are hand holding, doesn't mean you can't rely on stationary objects to help steady your camera. In this image, I was handholding with a very wide angle lens and used the rock face to lean on to keep myself steady.
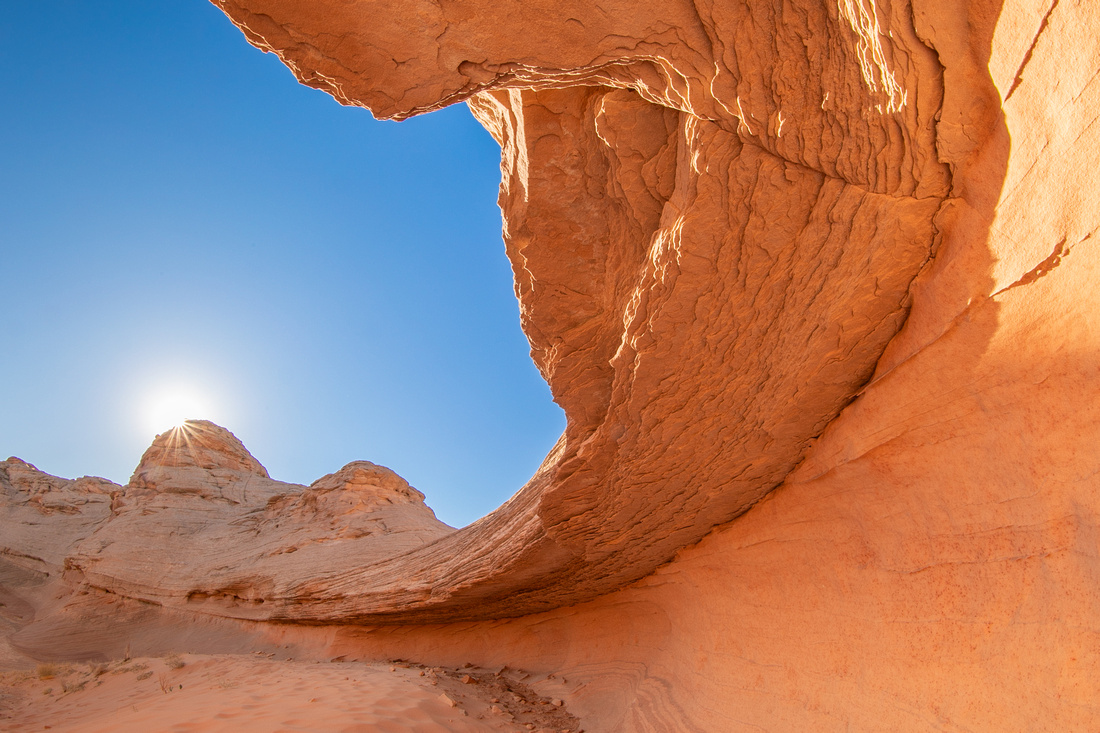 Sandstone, Page Arizona Sandstone, Page Arizona
Sandstone, Page Arizona |
Focus Stacking
I posted an article detailing focus stacking, so I wont go into the details in this one, but if you are interested you can access the article here. Focus stacking can be a great way to achieve deep focus even if you are using a wide aperture. When I do this, I often choose f8. It just seems to work the best. Although a tripod is super handy here, you can do this handheld. Just make sure you hold the camera steady so each image covers the same area. Once you have your composition selected, quickly refocus on different parts of the image from front to back then use post processing to stack later.
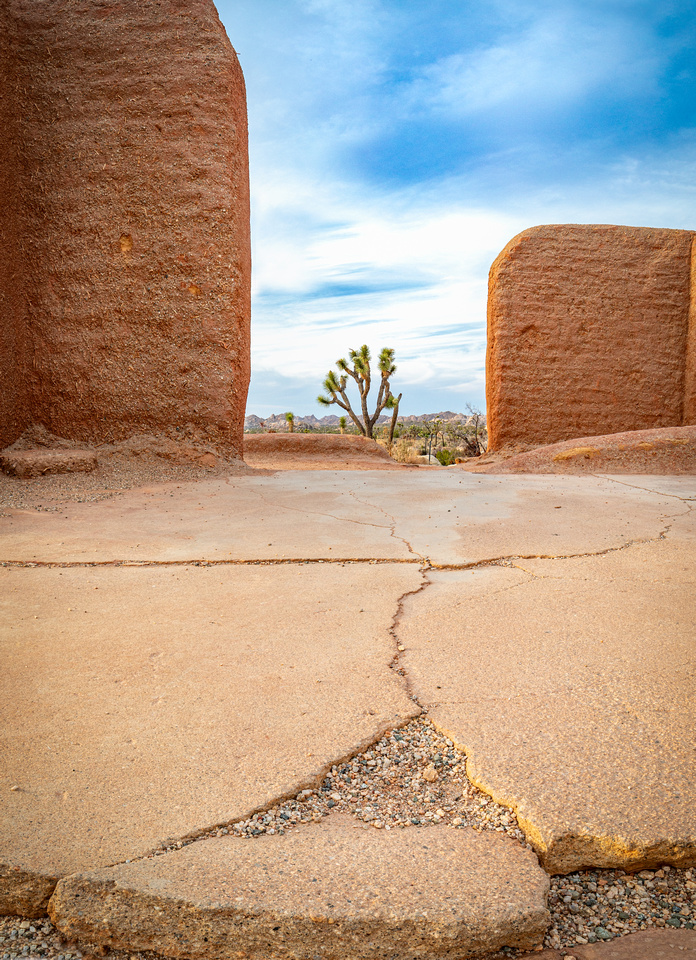 Ryan Ranch, Joshua Tree National Park Ryan Ranch, Joshua Tree National Park
Focus stacking used to capture Ryan Ranch in Joshua Tree National Park |
I'm a big fan of using a tripod for landscape photography but when the circumstances don't allow for that, it is nice to have some tools in the arsenal to improve the odds of getting good landscape photos. I hope this article helped provide some tools and tips you can use as well.
